PayPal QuickBooks Integration: How to Automate Your Accounting in 2026 Using PayTraQer
Introduction
PayPal makes it easy for businesses to accept online payments from customers, clients, and online marketplaces. But recording PayPal activity in QuickBooks Online is not always simple.
Video Tutorial for How to Integrate and Sync PayPal Transactions to QuickBooks Online using PayTraQer:
A single PayPal transfer to your bank can include multiple customer payments, PayPal fees, refunds, disputes, taxes, currency conversions, and other balance adjustments. By the time the money reaches your bank account, the final deposit may be very different from the actual sales amount recorded in PayPal.
If you record only the bank deposit in QuickBooks, your income may be understated, your PayPal fees may be missing, refunds may not be tracked correctly, and reconciliation can become difficult.
That is why PayPal accounting needs more than basic bank feed matching. You need a workflow that records gross sales, fees, refunds, taxes, customer details, and transfers properly inside QuickBooks Online.
Solution
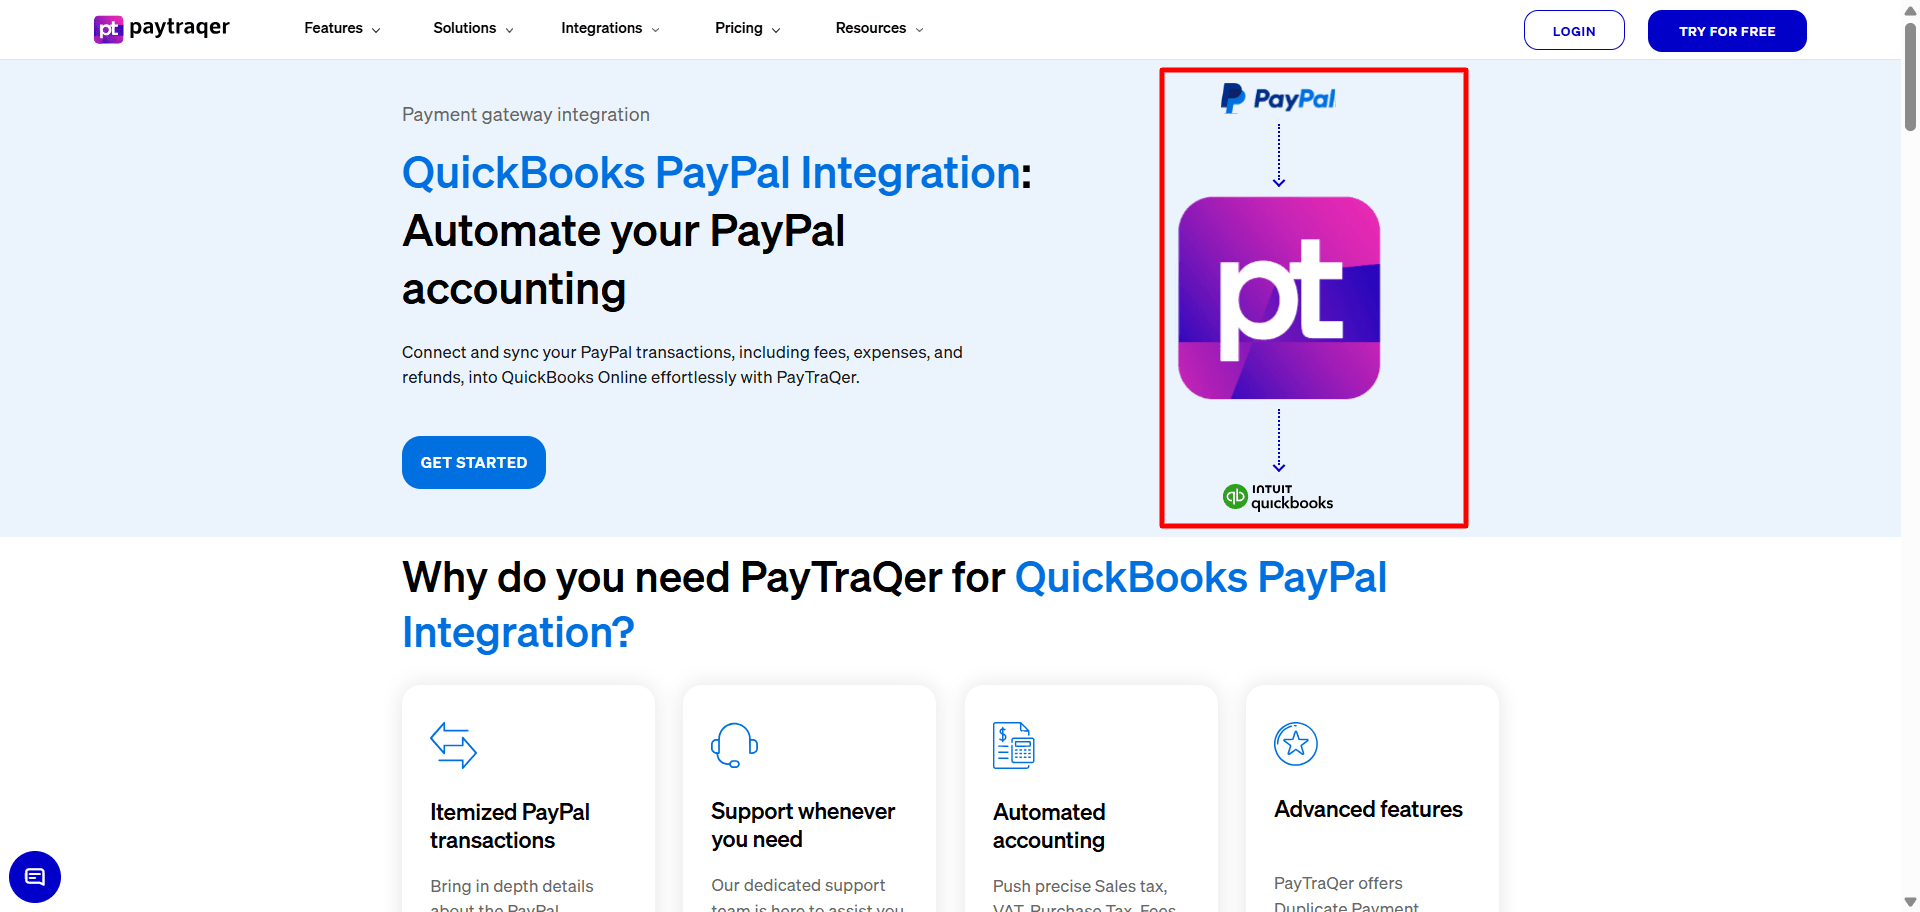
PayTraQer helps automate PayPal QuickBooks integration by syncing PayPal sales, fees, refunds, taxes, customers, products, and transfers into QuickBooks Online.
Instead of manually entering PayPal transactions or relying only on final bank deposits, PayTraQer helps record PayPal activity in a structured accounting format. It can post PayPal sales, record fees as expenses, sync refunds, and create bank transfers when money moves from your PayPal balance to your real bank account.This helps reduce manual work, improve reconciliation, and keep QuickBooks reports cleaner.
Who This Blog Is For
This guide is for businesses and accounting teams that use PayPal with QuickBooks Online, including:
E-commerce sellers using PayPal
SaaS businesses collecting recurring PayPal payments
Agencies and service businesses using PayPal invoices
Bookkeepers managing high-volume PayPal transactions
Accountants handling multiple PayPal clients
Business owners who want cleaner reconciliation and reporting
If you spend time fixing PayPal fees, matching transfers, tracking refunds, or explaining why PayPal deposits do not match sales, this guide will help you understand how PayTraQer can automate the workflow.
Can PayPal Connect Directly with QuickBooks Online?
QuickBooks Online can show PayPal-related deposits or transfers through the bank feed, but that does not always mean your PayPal accounting is complete.
The QuickBooks bank feed helps download bank transactions and lets users review, categorize, or match them. It does not automatically explain every PayPal sale, fee, refund, tax amount, dispute, or balance movement behind a bank deposit.
For example, PayPal may receive $1,000 in customer payments, deduct $35 in fees, adjust $100 for refunds, and then transfer $865 to your bank. If QuickBooks only shows the final $865 deposit, your books will not show the full PayPal activity behind that transfer.
To manage PayPal accounting properly, you need an automation tool that brings PayPal transaction details into QuickBooks Online in the right format. PayTraQer helps connect PayPal with QuickBooks Online and sync sales, fees, refunds, taxes, customers, products, and transfers.
Ways to Record PayPal Payments in QuickBooks Online
Method | What It Does | Limitation |
QuickBooks bank feed | Shows PayPal deposits or transfers after they reach your bank | Does not show complete PayPal sales, fees, refunds, taxes, or customer details |
Manual entry | Lets you enter PayPal sales, fees, refunds, and transfers manually | Time-consuming and easy to get wrong as volume grows |
PayTraQer automation | Syncs PayPal sales, fees, refunds, taxes, customers, products, and transfers into QuickBooks | Requires proper setup of accounts, mappings, and sync preferences |
Why PayPal Accounting Is Not Just About Recording Deposits
PayPal transfers to your bank are usually net amounts, not the full sales amount your business earned. Before PayPal sends money to your bank, it may deduct transaction fees, process refunds, apply disputes, adjust holds, or convert currency.
This means the amount shown in your bank feed is only the final amount received, not the complete PayPal activity behind it.
PayPal Activity | Amount |
Customer payment | $500 |
PayPal fee | $18 |
Refund adjustment | $75 |
Final transfer to bank | $407 |
In this example, PayPal collected $500 from the customer. After deducting the $18 PayPal fee and $75 refund adjustment, only $407 reached the bank.
If you record only the $407 bank deposit as income in QuickBooks, your books will miss the original $500 sale, the $18 PayPal fee, and the $75 refund. This can make revenue look lower, hide payment processing costs, and make refund tracking harder.
Proper PayPal accounting should track each part separately.
What Should Be Tracked | Why It Matters |
Gross sales | Shows the actual revenue earned |
PayPal fees | Tracks payment processing costs as expenses |
Refunds | Keeps returned sales accurate |
Taxes | Helps with correct tax reporting |
Transfers to bank | Helps match PayPal withdrawals with bank deposits |
When Should You Connect PayPal with QuickBooks Online?
You Process a High Volume of PayPal Transactions
Manual entry may work for a few PayPal payments. But when daily sales increase, entering every payment, fee, refund, and transfer manually becomes difficult.
A PayPal QuickBooks integration helps reduce repetitive work by syncing transaction details automatically.
Your PayPal Transfers Do Not Match Your Sales Totals
PayPal transfers usually do not match total sales because fees, refunds, disputes, holds, and currency adjustments may reduce the amount before it reaches your bank.
For example, PayPal sales may show $2,000, but your bank deposit may be $1,870 after fees and refunds. Without proper tracking, it becomes hard to explain the difference in QuickBooks.
You Spend Too Much Time Reconciling PayPal Deposits
If every PayPal transfer requires you to open PayPal reports, check fees, review refunds, and manually match deposits in QuickBooks, the process can take too long.
Connecting PayPal with QuickBooks Online helps bring the required transaction details into your books, making reconciliation faster and easier to review.
Your Accountant Needs Better Transaction-Level Detail
Accountants and bookkeepers need more than the final bank deposit. They need details such as customer payments, gross sales, PayPal fees, refunds, taxes, and transfer movement.
Clean PayPal data in QuickBooks helps with monthly review, tax preparation, profit reporting, and audit readiness.
You Sell Through Multiple Platforms
Many businesses use PayPal across Shopify, WooCommerce, eBay, invoices, subscription tools, payment links, and custom checkout pages.
When PayPal receives payments from multiple sources, tracking everything manually can become confusing. A PayPal QuickBooks integration helps organize this activity inside QuickBooks Online.
What Is PayTraQer?
PayTraQer is an accounting automation tool that connects payment gateways and e-commerce platforms with QuickBooks Online.
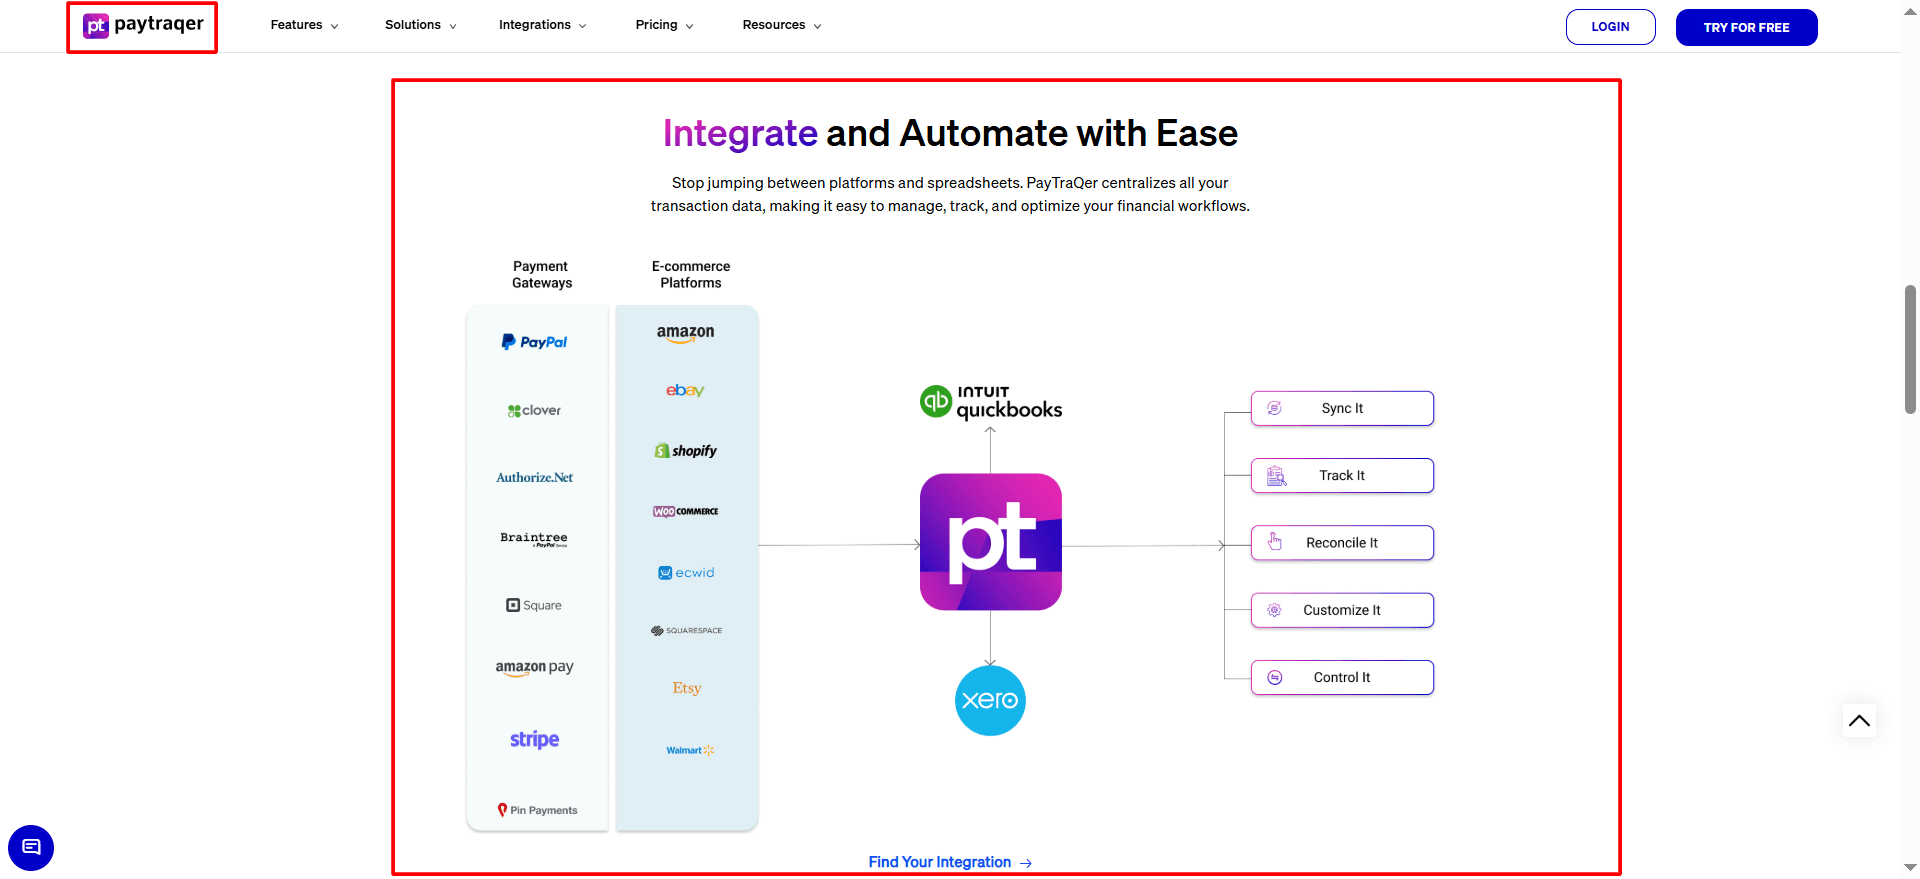
For PayPal users, PayTraQer helps sync payments, fees, refunds, payouts or transfers, customer details, and product details into QuickBooks Online. The official PayTraQer getting started guide states that it can create sales as Sales Receipts or Invoices plus Payments, fees as Expenses, refunds as Refund Receipts, and payouts as Bank Transfers from clearing to checking.
PayTraQer supports both detailed and summary-style accounting workflows. This makes it useful for sellers, SaaS companies, agencies, accountants, and bookkeepers who want to reduce manual entry and improve reconciliation accuracy.
Why Use PayTraQer for PayPal QuickBooks Integration?
PayTraQer helps automate the main parts of PayPal accounting inside QuickBooks Online. It is useful when you want to track not just the final bank deposit, but also the sales, fees, refunds, taxes, and customer details behind that deposit.
PayPal Accounting Need | How PayTraQer Helps |
Sales syncing | Brings PayPal sales into QuickBooks |
Fee tracking | Records PayPal fees separately |
Refund handling | Syncs PayPal refunds to QuickBooks |
Transfer matching | Helps match PayPal transfers with bank deposits |
Customer details | Syncs customer-level transaction data |
Tax details | Helps keep tax data organized |
Multi-currency | Supports PayPal payments in different currencies |
Duplicate prevention | Helps avoid duplicate transaction entries |
How to Connect PayPal to QuickBooks Online Using PayTraQer
Before you start, make sure you have access to install apps in your QuickBooks Online company, access to your PayPal account, and admin approval if you are setting this up for a client. PayTraQer also supports an Invite admin or client option if you are not the admin.
Step 1: Install PayTraQer from QuickBooks Online
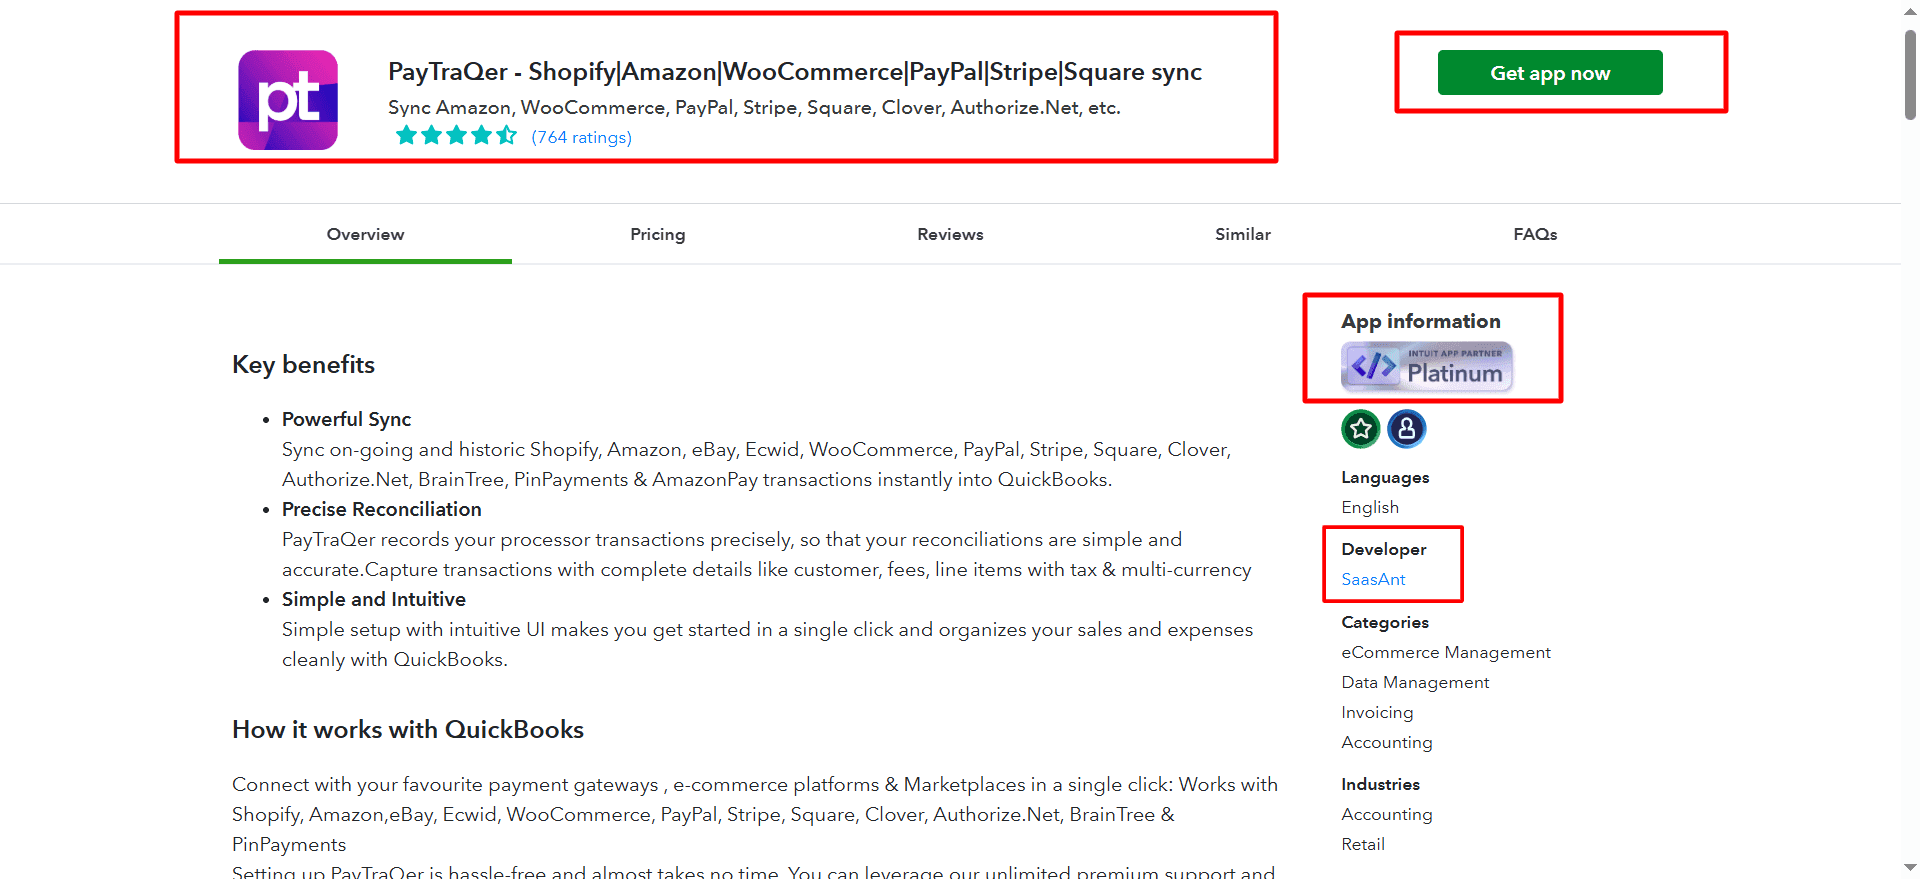
Log in to QuickBooks Online and go to the Apps section. Search for PayTraQer, select it, and click Get app now.
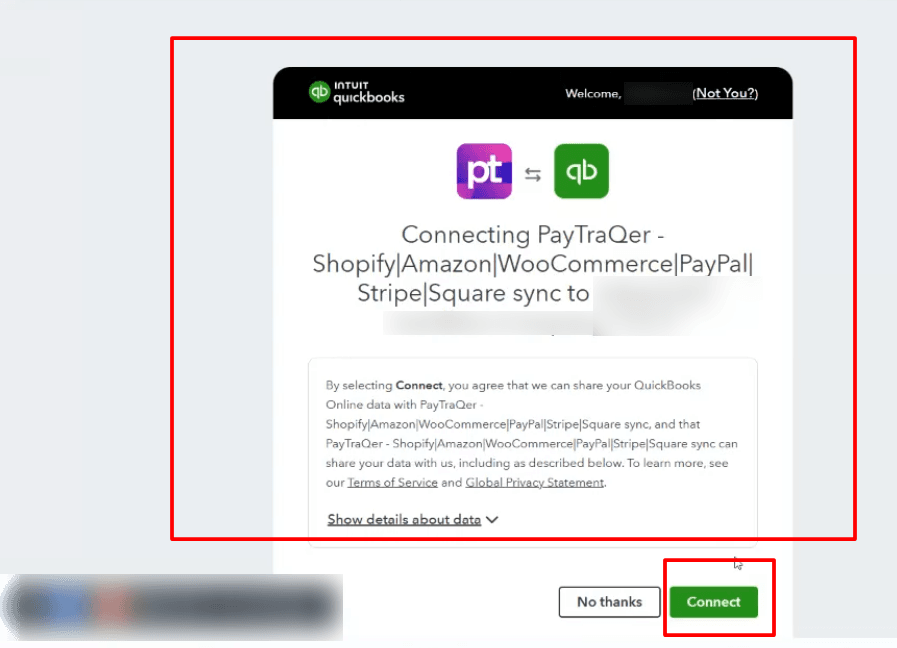
Follow the prompts and authorize access to your QuickBooks company.
Step 2: Choose Your Sync Mode
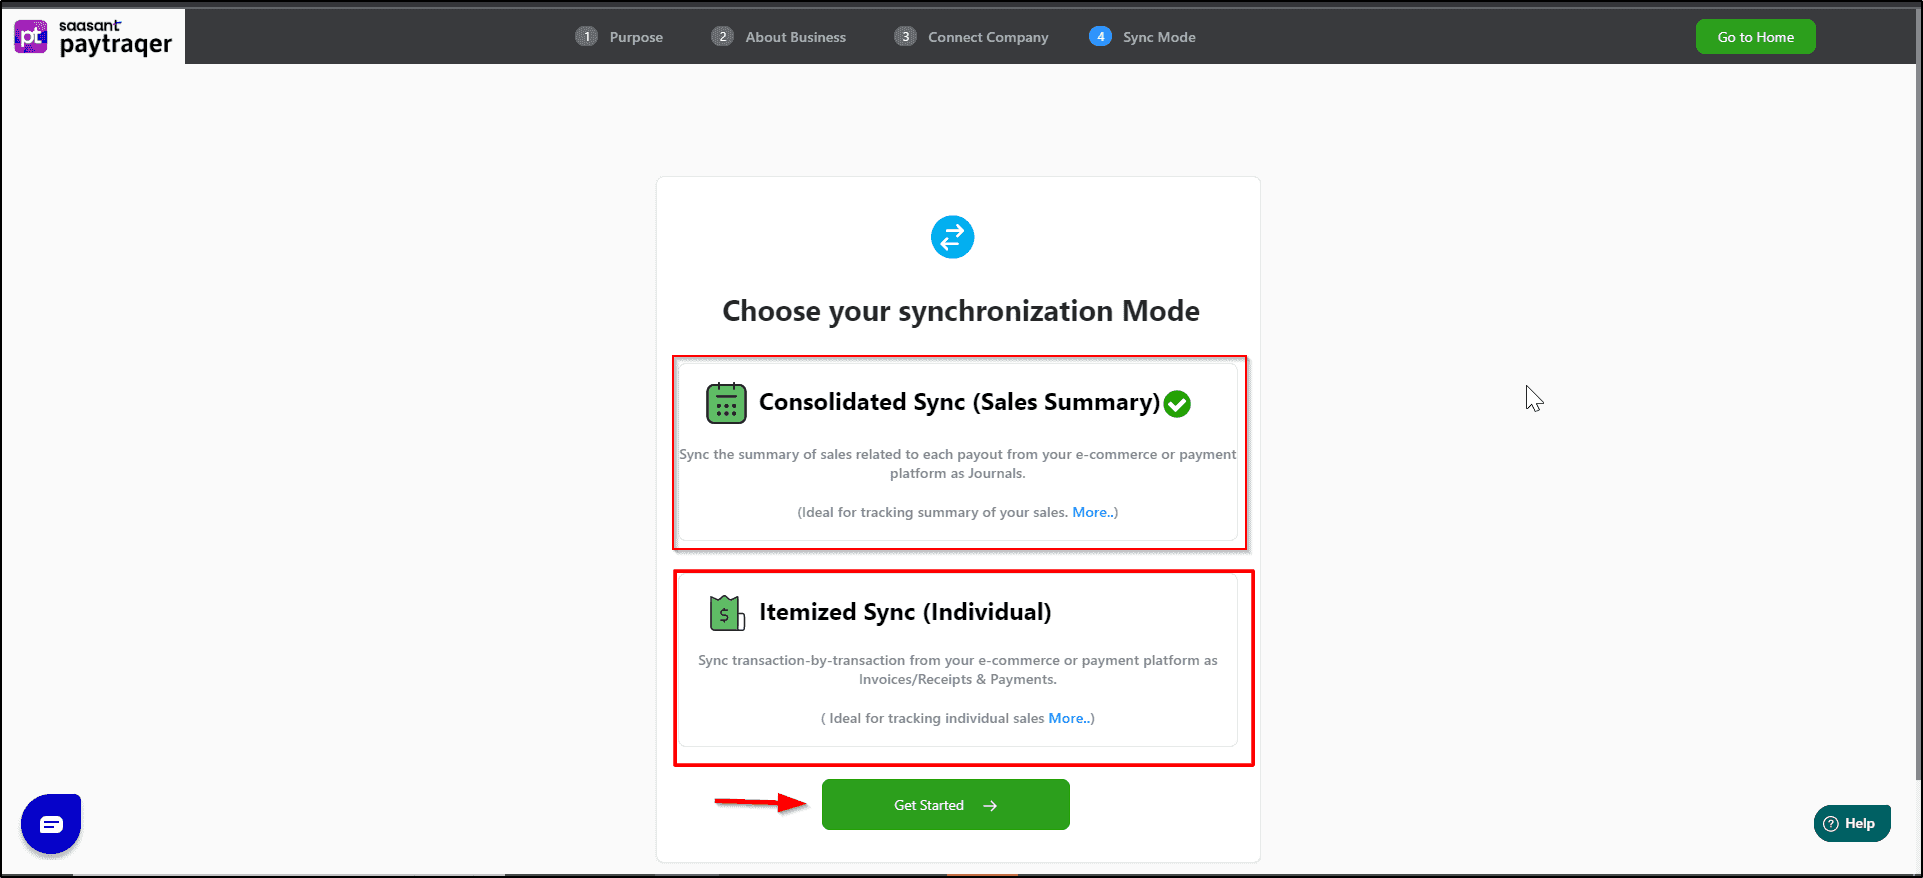
After connecting QuickBooks Online, choose how PayPal data should be posted. PayTraQer offers Consolidated Sync and Itemized Sync. Consolidated Sync creates fewer entries and is useful for faster reconciliation. Itemized Sync keeps customer and item details in QuickBooks.
Sync Mode | Best For | What It Does |
Consolidated Sync | High-volume PayPal users | Posts fewer summary entries for easier reconciliation |
Itemized Sync | Businesses needing detailed records | Posts individual sales with customer and item details |
Step 3: Connect PayPal in PayTraQer
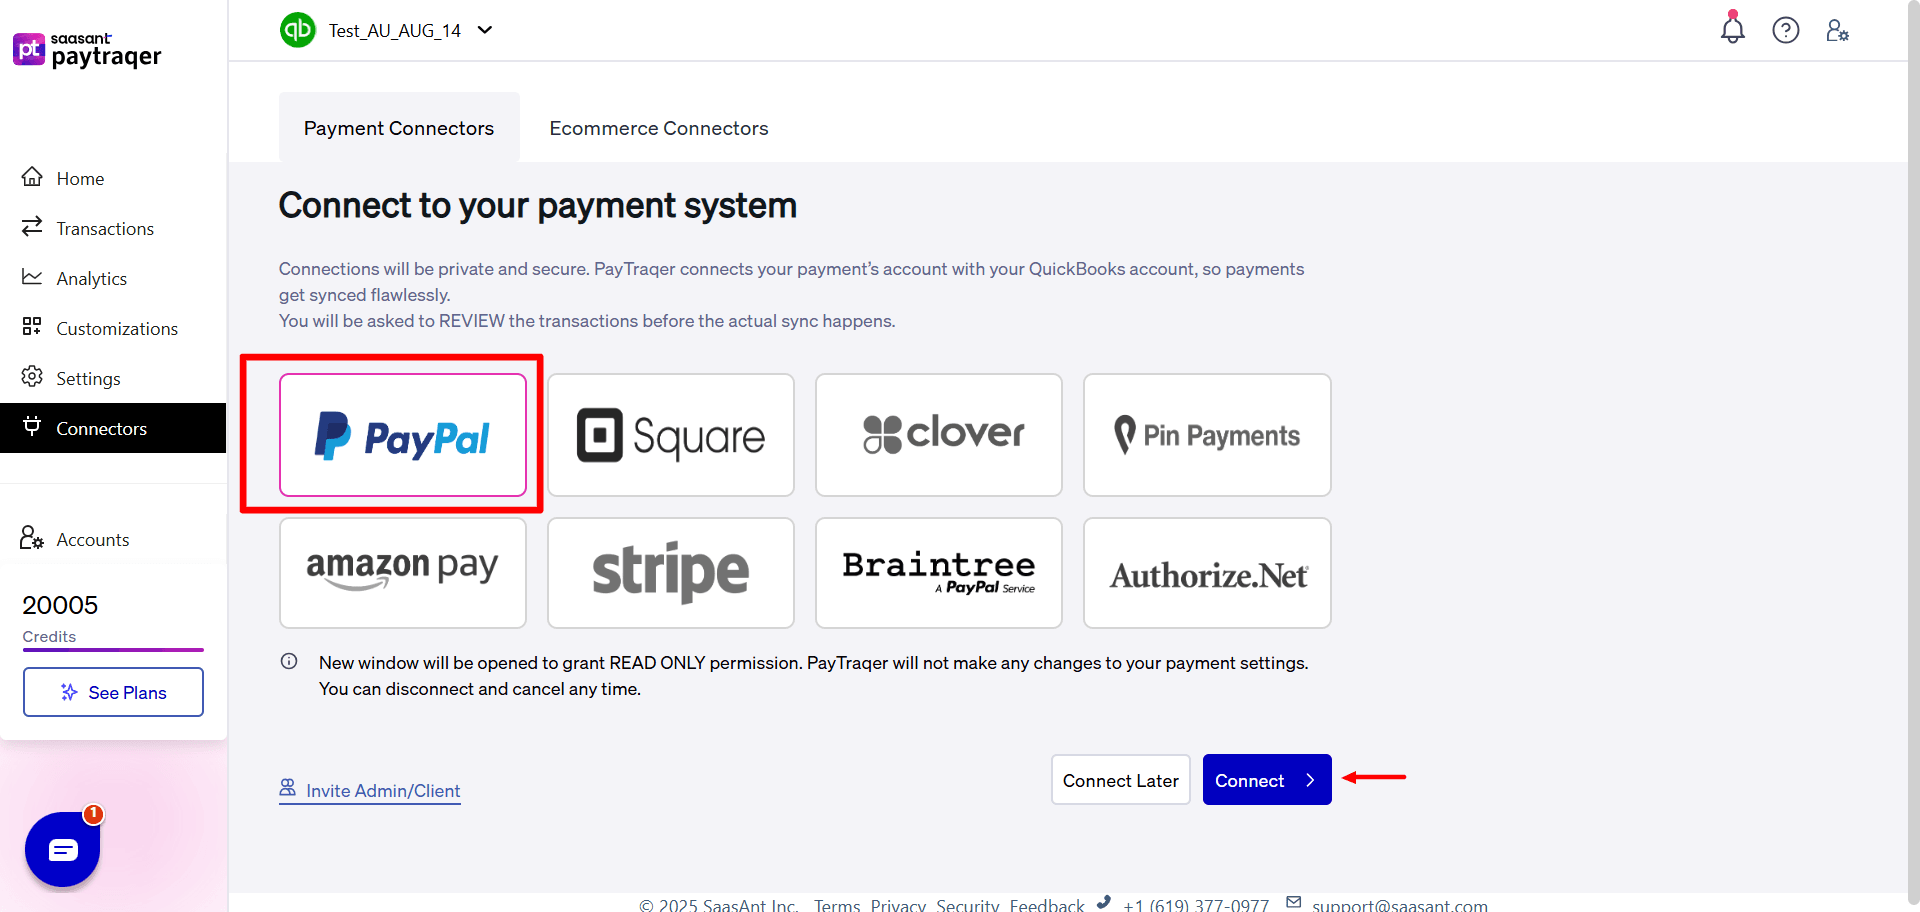
In PayTraQer, go to Connectors, open Payment Connectors, select PayPal, and click Connect. Sign in to PayPal and approve access.
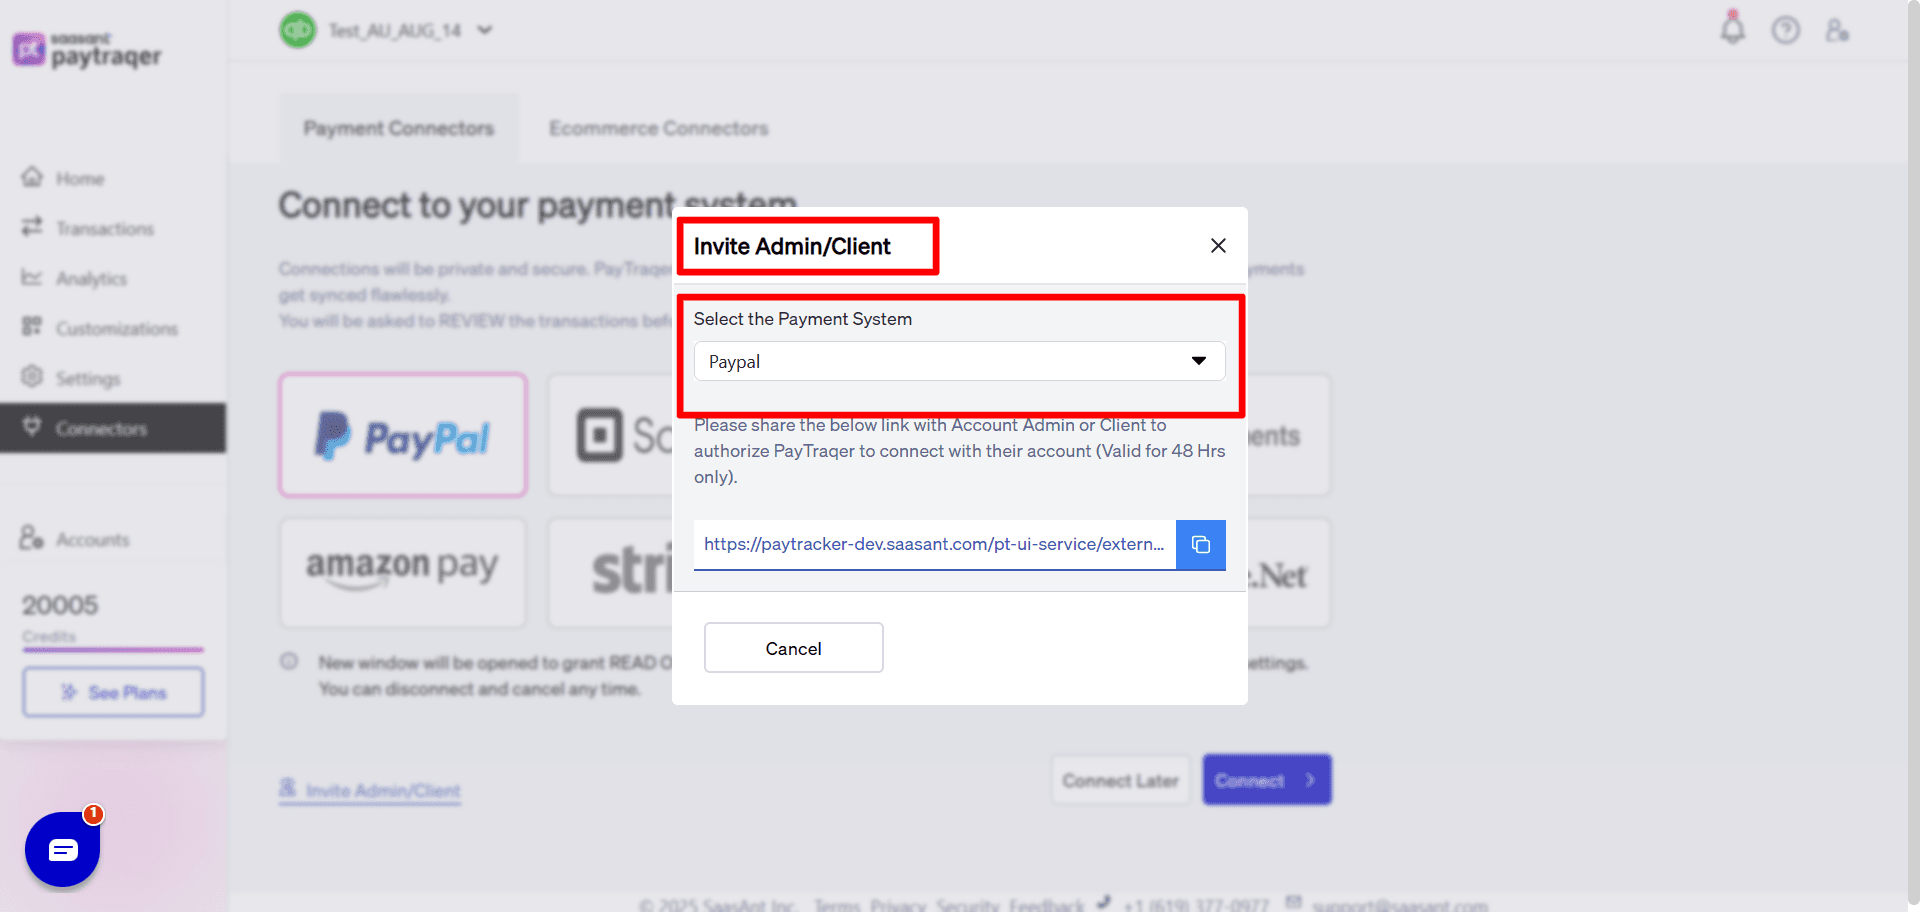
If you are not the admin, use Invite admin or client to send the approval link.
PayTraQer uses read-only PayPal access to fetch sales, fees, refunds, payouts, customers, and items. In QuickBooks Online, it creates and updates records based on your approved sync settings.
Step 4: Complete the First-Time Setup
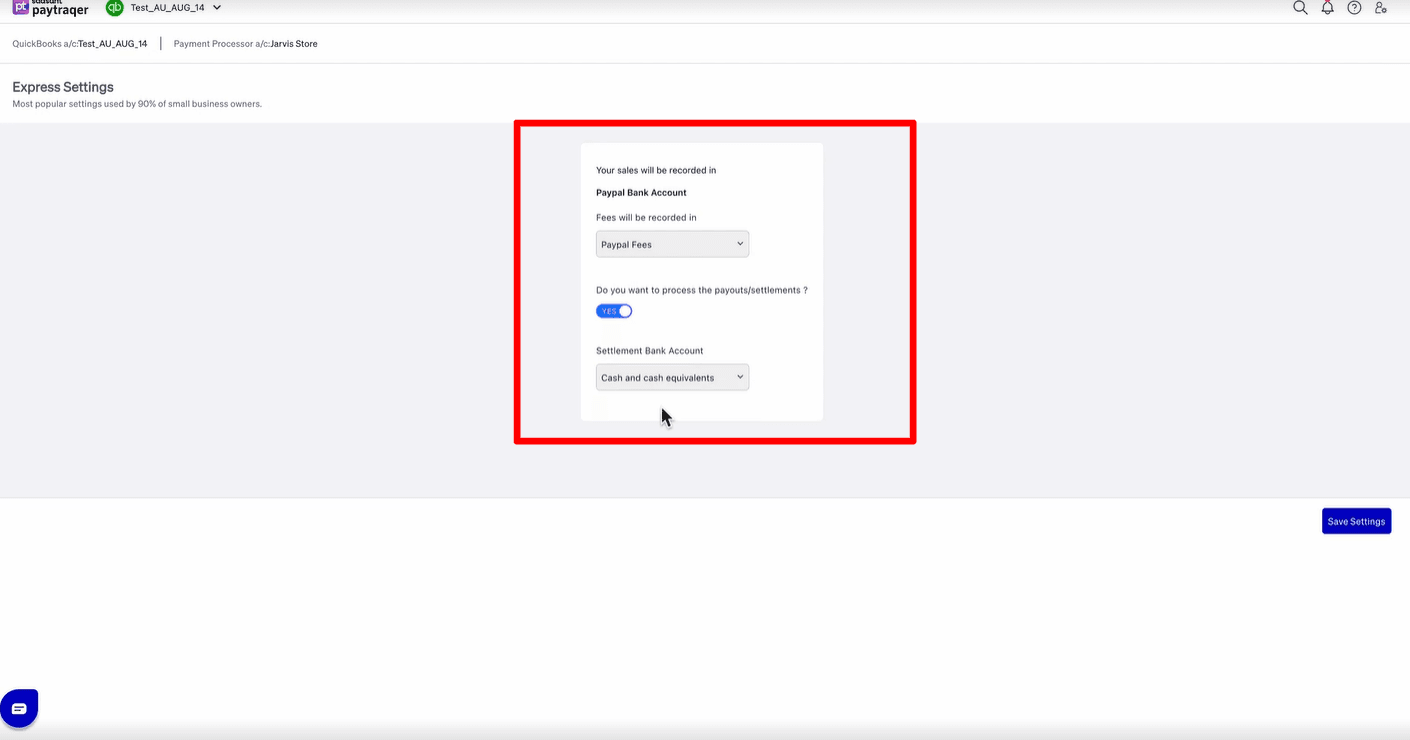
After PayPal approval, PayTraQer redirects you to the setup page. Turn on payment and settlement processing if you want PayTraQer to handle PayPal transfers. When this option is on, choose the PayPal clearing bank account that will hold PayPal activity before the money reaches your real bank.
After saving, PayTraQer automatically downloads the last 60 days of PayPal data.
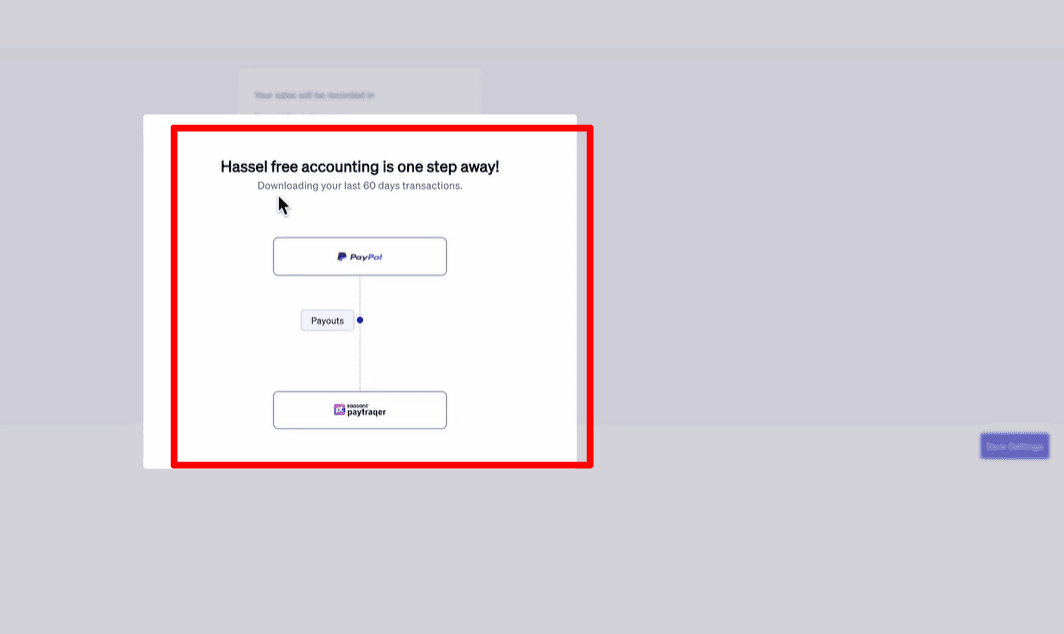
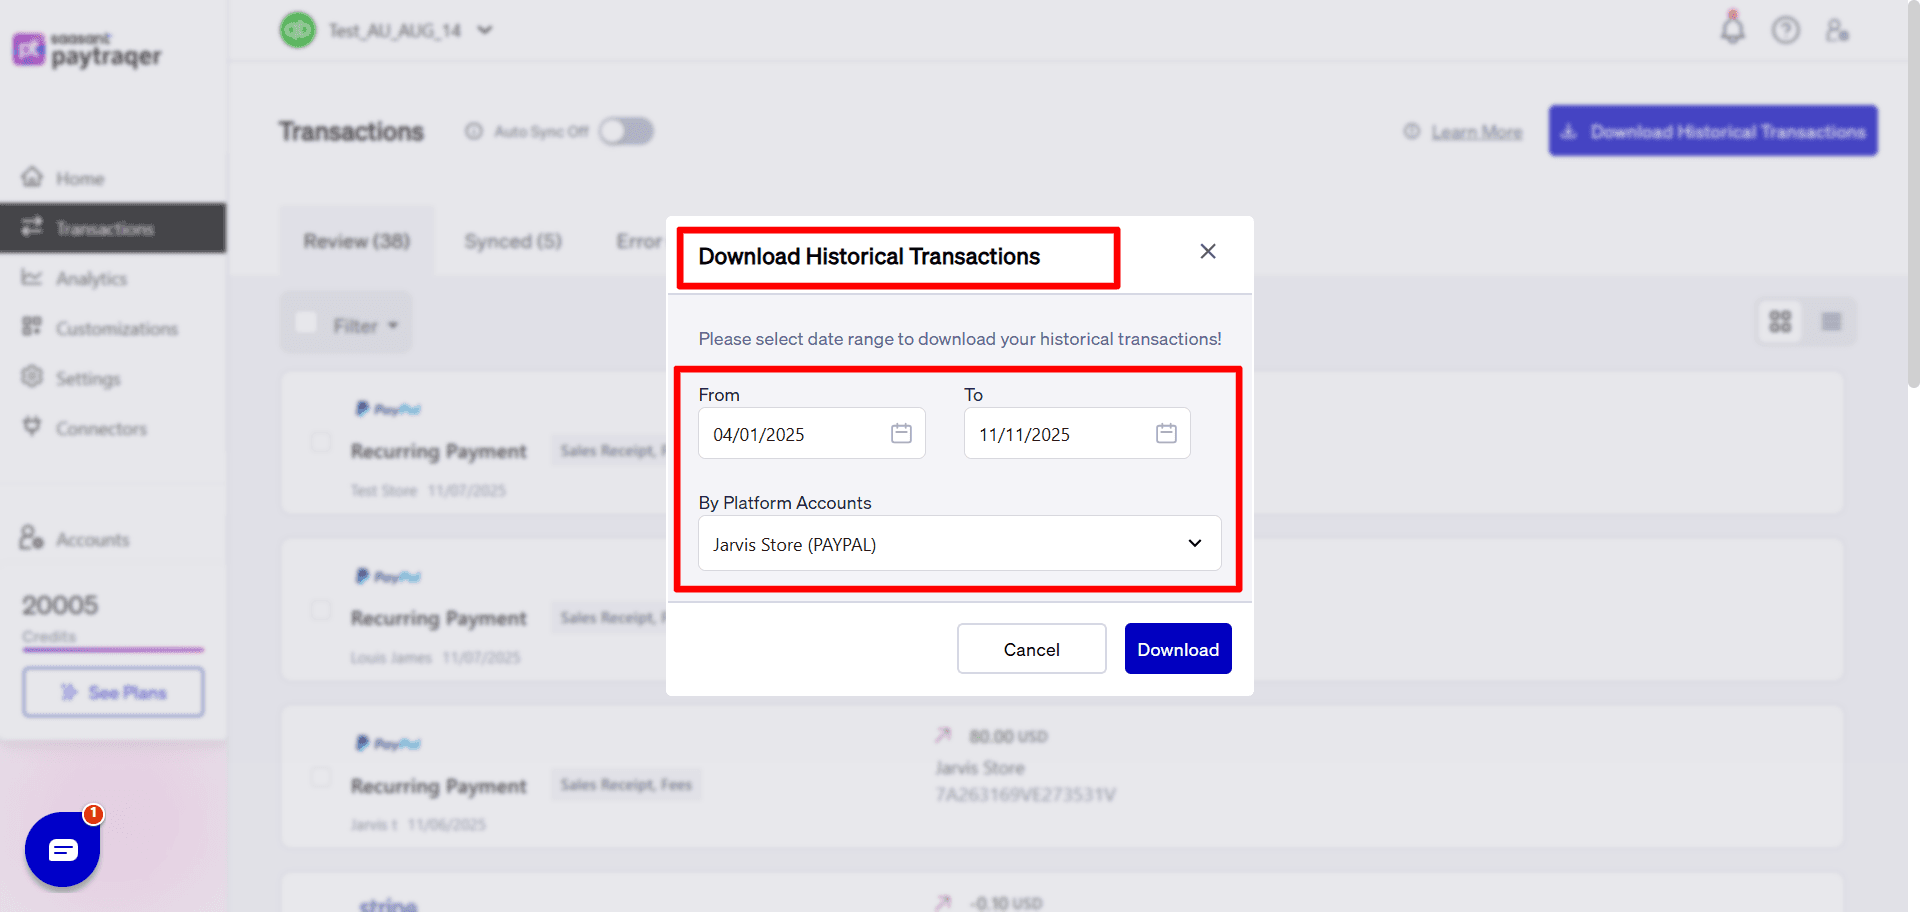
You can use Download historical transactions to pull other date ranges with From and To filters.
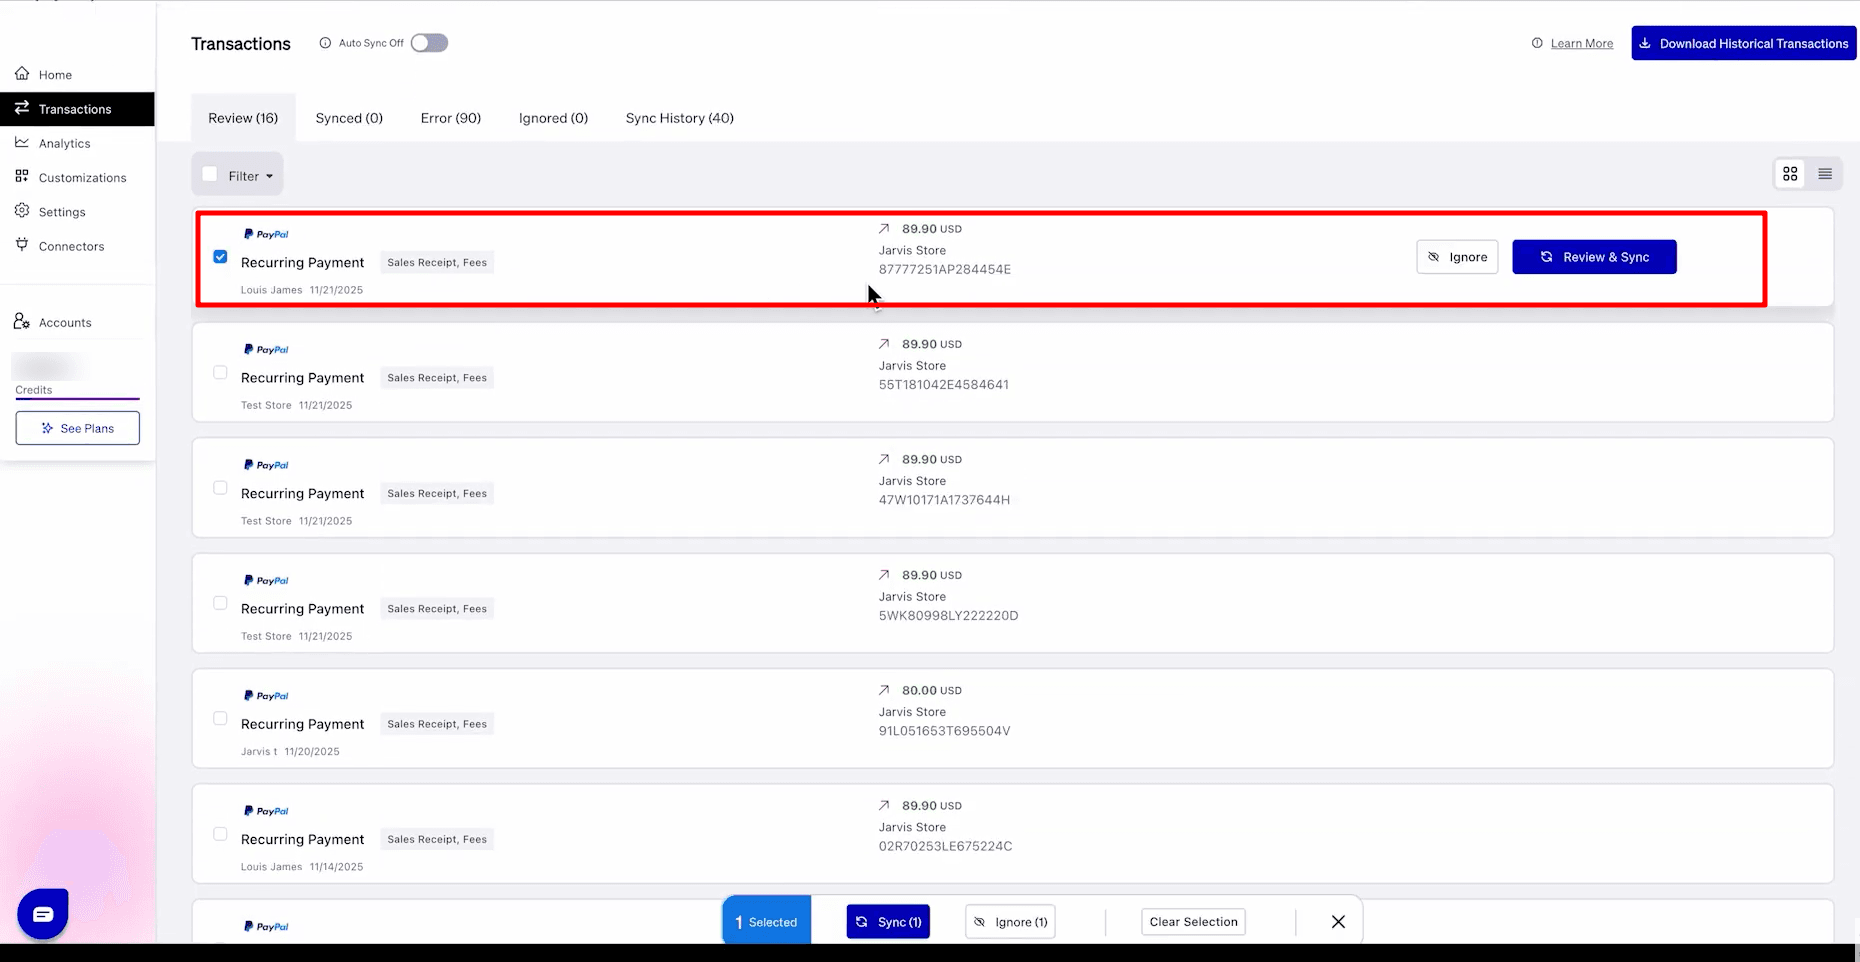
Step 5: Enable Auto Sync
Turn on Auto Sync if you want PayTraQer to download and sync new PayPal transactions into QuickBooks at regular intervals. This helps keep PayPal sales, fees, refunds, and transfers updated without manual work.
Step 6: Configure Sales Settings
In PayPal Sales Settings, choose the PayPal clearing bank account, payment method, customer creation rules, common customer settings, customer matching rules, class, and location. For multi-currency workflows, PayTraQer recommends setting a clearing bank for each currency.
Step 7: Configure Products, Taxes, Fees, and Transfers
Review your product, tax, fee, and payout settings before syncing. PayTraQer can create items, use common items, apply tax settings, assign PayPal as the fee vendor, post fees to a PayPal Fees expense account, and create transfers from the PayPal clearing account to the real bank account.
PayTraQer’s payout settings are important because they control how money moves from the payment system clearing account to the real bank account in QuickBooks. When configured correctly, the bank feed deposit can match the sales and fees already posted by PayTraQer.
How PayTraQer Records PayPal Sales in QuickBooks Online
PayTraQer records PayPal sales in QuickBooks based on the type of PayPal transaction being synced.
For example, a PayPal payment can be recorded as a Sales Receipt with the related fee recorded as an expense. An invoice payment can be recorded as an Invoice and Payment, with fees recorded separately. PayTraQer’s PayPal sync guide lists how PayPal transaction types are converted into QuickBooks entries.
PayPal Transaction Type | QuickBooks Entry Created by PayTraQer |
Payment | Sales Receipt, Fees as Expense |
Invoice Payment | Invoice, Payment, Fees as Expense |
Customer Refund | Refund |
Payout or Transfer | Bank Transfer |
Expense | PayPal Fees as Expense |
Adjustment | Expense |
This helps QuickBooks show the actual PayPal sales activity instead of showing only the final bank deposit. Customer, product, tax, discount, and payment details can also be mapped based on your PayTraQer settings.
How PayTraQer Handles PayPal Fees
PayPal deducts transaction fees before money is available for transfer to your bank. This means the bank deposit is usually lower than the actual customer payment.
PayTraQer records PayPal fees separately as expenses in QuickBooks. It is best to use a dedicated expense account such as PayPal Fees or Payment Processing Fees.
Activity | Amount | QuickBooks Treatment |
PayPal sale | $100 | Income |
PayPal fee | $3.49 | Expense |
Net PayPal balance | $96.51 | PayPal clearing balance |
Transfer to bank | $96.51 | Bank transfer |
By recording the sale and fee separately, PayTraQer helps keep gross sales and expenses accurate.
How PayTraQer Handles PayPal Refunds
PayPal refunds should not be ignored or manually reduced from sales without proper tracking. A refund affects revenue, customer records, PayPal balance, and bank reconciliation.
PayTraQer can sync PayPal refund activity into QuickBooks so refunds are recorded separately instead of being hidden inside a lower bank transfer amount.
Proper refund recording helps you see what was sold, what was refunded, and how the refund affected the PayPal balance or future transfer.
How PayTraQer Handles PayPal Transfers to Bank
PayPal transfers are movements of money from your PayPal balance to your business bank account.
A single PayPal transfer may include many sales, fees, refunds, disputes, currency adjustments, and other balance movements. The transfer should not be treated as new income because the sales should already be recorded.
PayTraQer records PayPal transfers as Bank Transfers from the PayPal clearing account to your real bank account. The PayTraQer reconciliation guide explains that PayTraQer syncs sales, fees, and refunds into the PayPal Bank Account, then creates a Bank Transfer to the checking account when money is transferred from PayPal to the bank.
This makes the QuickBooks bank feed easier to match and helps avoid duplicate income.
Why a PayPal Bank Account Is Important in QuickBooks
A PayPal Bank Account in QuickBooks works like a clearing account. It temporarily holds PayPal activity before the money reaches your real bank.
When a customer pays through PayPal, the PayPal clearing balance increases. PayPal fees, refunds, and adjustments reduce that balance. When PayPal transfers money to your bank, the balance moves from the PayPal Bank Account to your checking account.
Entry | Effect on PayPal Bank Account |
PayPal sale | Increases balance |
PayPal fee | Decreases balance |
Refund | Decreases balance |
Adjustment | Increases or decreases balance |
Transfer to bank | Decreases balance |
Pending PayPal funds | Remains as balance |
PayTraQer’s reconciliation guide recommends creating the PayPal Bank Account as a Bank type account in QuickBooks, with Detail Type as Checking, so QuickBooks can reconcile it and use banking transfers properly.
How to Reconcile PayPal Payments in QuickBooks Online
Reconciling PayPal in QuickBooks means checking whether your PayPal sales, fees, refunds, transfers, and bank deposits are recorded correctly.
Step 1: Make Sure PayPal Transactions Are Synced
First, check that all PayPal transactions for the selected period are synced into QuickBooks Online. This includes payments, invoice payments, fees, refunds, adjustments, and transfers.
Step 2: Check Sales, Fees, Refunds, and Transfers in QuickBooks
Review the PayPal entries created in QuickBooks. Make sure sales are recorded as income, PayPal fees are posted as expenses, refunds are recorded separately, and transfers are treated as bank transfers instead of income.
Step 3: Review the PayPal Bank Account
The PayPal Bank Account should show the movement of money between PayPal and your real bank.
Sales increase the balance. Fees, refunds, and transfers reduce it. Any remaining balance may represent pending PayPal funds, holds, timing differences, or unsynced transactions.
Step 4: Match PayPal Transfers to Bank Deposits
Once PayTraQer records the PayPal transfer as a bank transfer, go to the QuickBooks bank feed and match the real bank deposit with the transfer.
Do not add the deposit as new income if PayPal sales are already synced. Adding it again can duplicate revenue.
Step 5: Compare the PayPal Bank Account with PayPal Balance
Compare the PayPal Bank Account balance in QuickBooks with the PayPal balance or balance-affecting transaction report for the same period.
If the balances do not match, review missing fees, refunds, transfers, duplicate entries, or timing differences.
Step 6: Fix Failed, Duplicate, or Missing Syncs
Check for failed PayPal transactions, duplicate entries, missing refunds, missing fees, transfers not synced, manual bank feed entries, or currency differences.
Resolve these before completing reconciliation.
Step 7: Complete Bank Reconciliation in QuickBooks
Once PayPal transfers are matched and the PayPal Bank Account looks correct, complete the normal reconciliation in QuickBooks Online.
This confirms that the PayPal records in QuickBooks match the actual PayPal and bank statement activity.
Who Should Use PayTraQer for PayPal QuickBooks Integration?
PayTraQer is useful for businesses and accounting teams that need more than basic PayPal deposits in QuickBooks Online.
E-commerce Sellers Using PayPal
E-commerce sellers often receive many PayPal payments from online stores, marketplaces, and checkout pages. PayTraQer helps bring sales, fees, refunds, taxes, and transfers into QuickBooks.
SaaS Businesses Collecting Recurring PayPal Payments
SaaS businesses may collect recurring PayPal payments, upgrades, cancellations, and refunds. PayTraQer helps sync this activity into QuickBooks for easier revenue tracking.
Agencies and Service Businesses Using PayPal Invoices
Agencies, consultants, and freelancers often use PayPal invoices to collect payments. PayTraQer helps record invoice payments, related fees, and transfers in QuickBooks.
Accountants Managing Multiple PayPal Clients
Accountants handling several PayPal-based businesses need consistent records across clients. PayTraQer helps reduce manual cleanup and makes review easier.
Bookkeepers Handling High-Volume PayPal Activity
For bookkeepers, PayPal reconciliation can become time-consuming when there are many daily transactions. PayTraQer helps automate the flow and makes transfers easier to match.
Businesses That Need Clean Reconciliation and Accurate Reporting
Any business that wants cleaner QuickBooks records can benefit from PayTraQer. It helps separate gross sales, PayPal fees, refunds, taxes, and transfers for better reporting.
For more information please visit this page : https://www.paytraqer.com/integrations/quickbooks-paypal-integration/
Final Thoughts
PayPal QuickBooks integration is not only about syncing payment data. It is about recording PayPal activity in a way that keeps QuickBooks accurate.
PayPal transactions can include sales, fees, refunds, taxes, disputes, adjustments, currency changes, and transfers before the money reaches your bank. If you record only the final deposit, your books may miss the full transaction details behind that transfer.
PayTraQer helps automate this workflow by syncing PayPal sales, fees, refunds, taxes, customers, products, and transfers into QuickBooks Online. This gives businesses a cleaner way to manage PayPal accounting, reduce manual entry, and make reconciliation easier.
FAQs
1. Does PayPal integrate directly with QuickBooks Online?
QuickBooks Online can show PayPal-related deposits or transfers through the bank feed, but bank feed matching alone does not always provide complete PayPal accounting. It may not show the full sales, fees, refunds, taxes, and customer details behind each transfer.
2. How do I record PayPal fees in QuickBooks?
PayPal fees should be recorded as expenses in QuickBooks. It is best to use a dedicated account such as PayPal Fees or Payment Processing Fees. PayTraQer can sync PayPal fees separately, so gross sales and processing costs stay clear.
3. How do I reconcile PayPal transfers in QuickBooks?
To reconcile PayPal transfers, make sure PayPal sales, fees, refunds, and transfers are recorded first. Then match the PayPal transfer in QuickBooks with the bank deposit shown in the bank feed.
4. What is a PayPal Bank Account in QuickBooks?
A PayPal Bank Account works like a clearing account in QuickBooks. It tracks PayPal money before it reaches your real bank. Sales increase the balance, while fees, refunds, and transfers reduce it.
5. Can PayTraQer sync PayPal refunds to QuickBooks?
Yes. PayTraQer can sync PayPal refund activity into QuickBooks. This helps keep refunds separate from sales and makes reconciliation easier.
6. Can PayTraQer sync PayPal fees separately?
Yes. PayTraQer can record PayPal fees separately as expenses in QuickBooks. This helps you track payment processing costs clearly instead of hiding fees inside net deposits.
7. Can PayTraQer handle PayPal transfers to bank?
Yes. PayTraQer can record PayPal transfers as Bank Transfers from the PayPal Bank Account to your real bank account. This helps match the transfer with the bank feed deposit.
8. Should I use summary sync or individual sync for PayPal?
Use summary sync if you process a high volume of PayPal transactions and want fewer entries in QuickBooks. Use individual sync if you need customer-level or item-level details. The right choice depends on your reporting needs and reconciliation workflow.