Shopify QuickBooks Integration - A Complete Guide
 Managing an online store is thrilling, but keeping Shopify and QuickBooks Online synchronized can often feel like a perpetual challenge. The manual tracking of daily sales, refunds, discounts, Shopify fees, tax breakdowns, and payouts can consume hours of bookkeeping, especially as transaction volumes rise. For Shopify sellers, accountants, and bookkeepers, automation has become a necessity for ensuring both accuracy and efficiency.
This is where PayTraQer emerges as a groundbreaking integration tool. It automatically captures every Shopify transaction and syncs it into QuickBooks Online with accurate, error-free entries. Whether you need detailed item-level sync or daily consolidated summaries, PayTraQer offers unmatched flexibility to fit your workflow.
This blog is ideal for Shopify sellers, accountants, bookkeepers, and small to medium-sized eCommerce businesses looking to automate their bookkeeping and ensure accurate financial records.
Contents
How to Connect Shopify with QuickBooks Online using PayTraQer (Step-by-Step Guide)
Why Connect QuickBooks with Shopify Using PayTraQer?
Wrap Up
Frequently Asked Questions
How to Connect Shopify with QuickBooks Online using PayTraQer (Step-by-Step Guide)
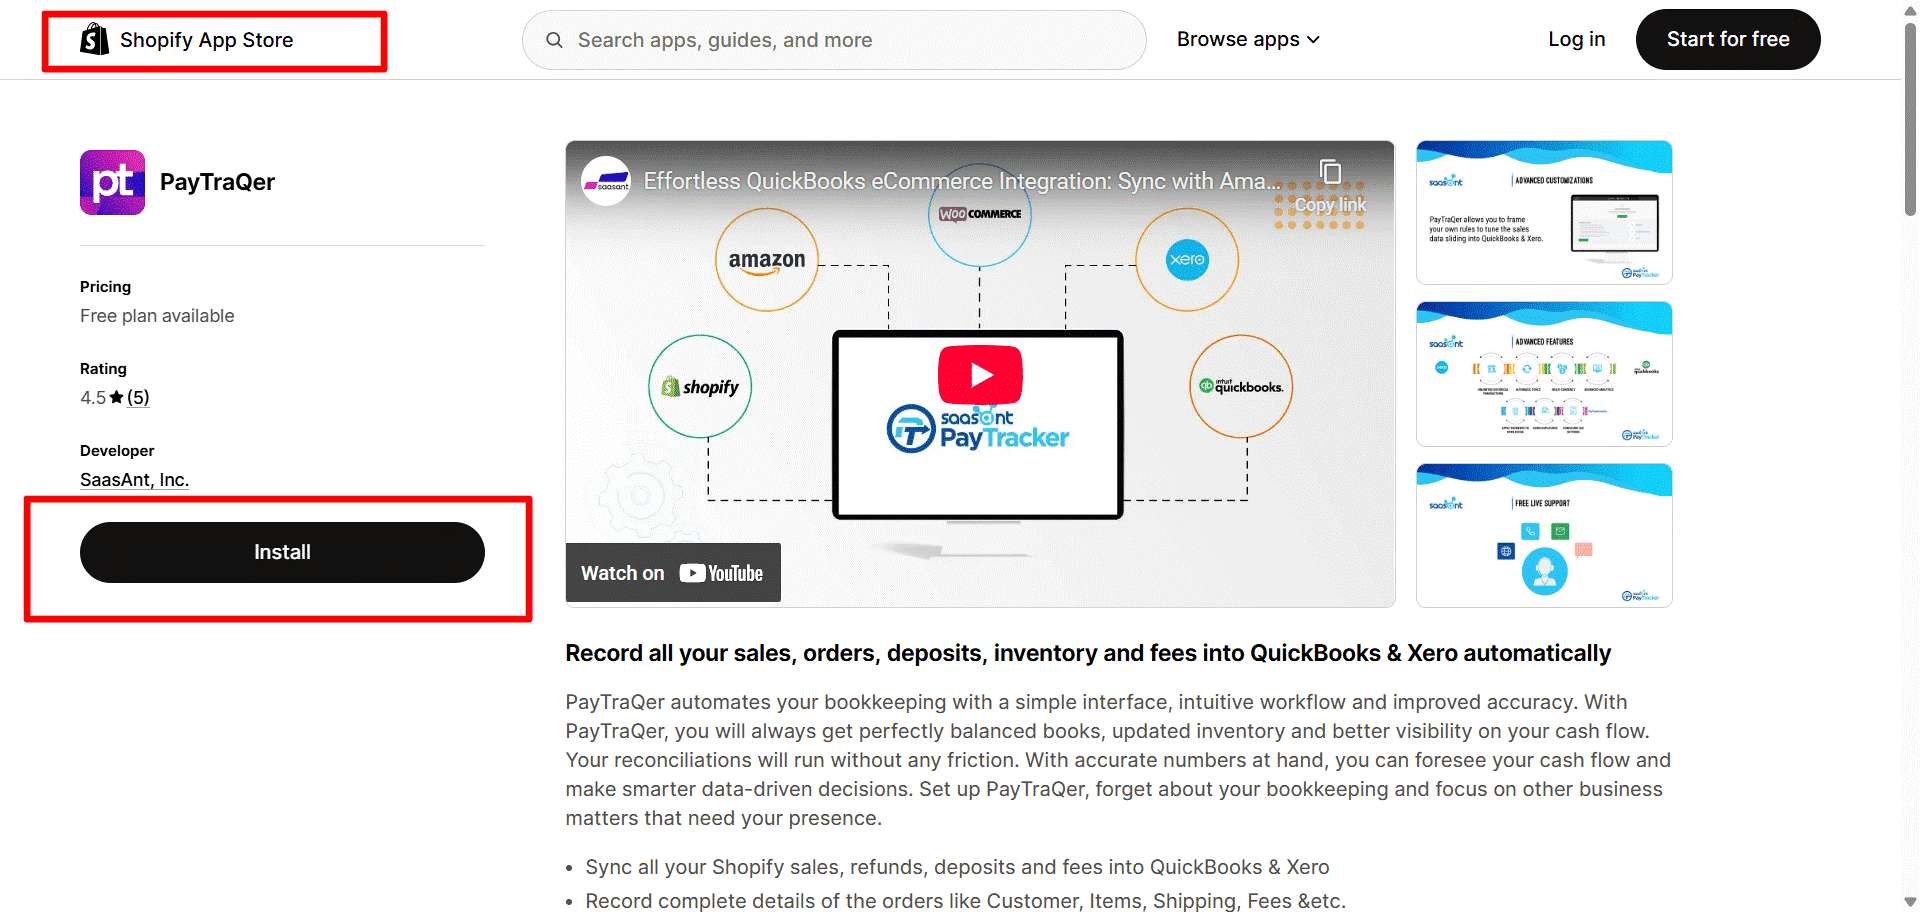
Step 1: Install PayTraQer from the QuickBooks App Store
Sign in to your QuickBooks Online account.
Go to the Apps menu on the left side.
Look for PayTraQer and click on Get App Now.
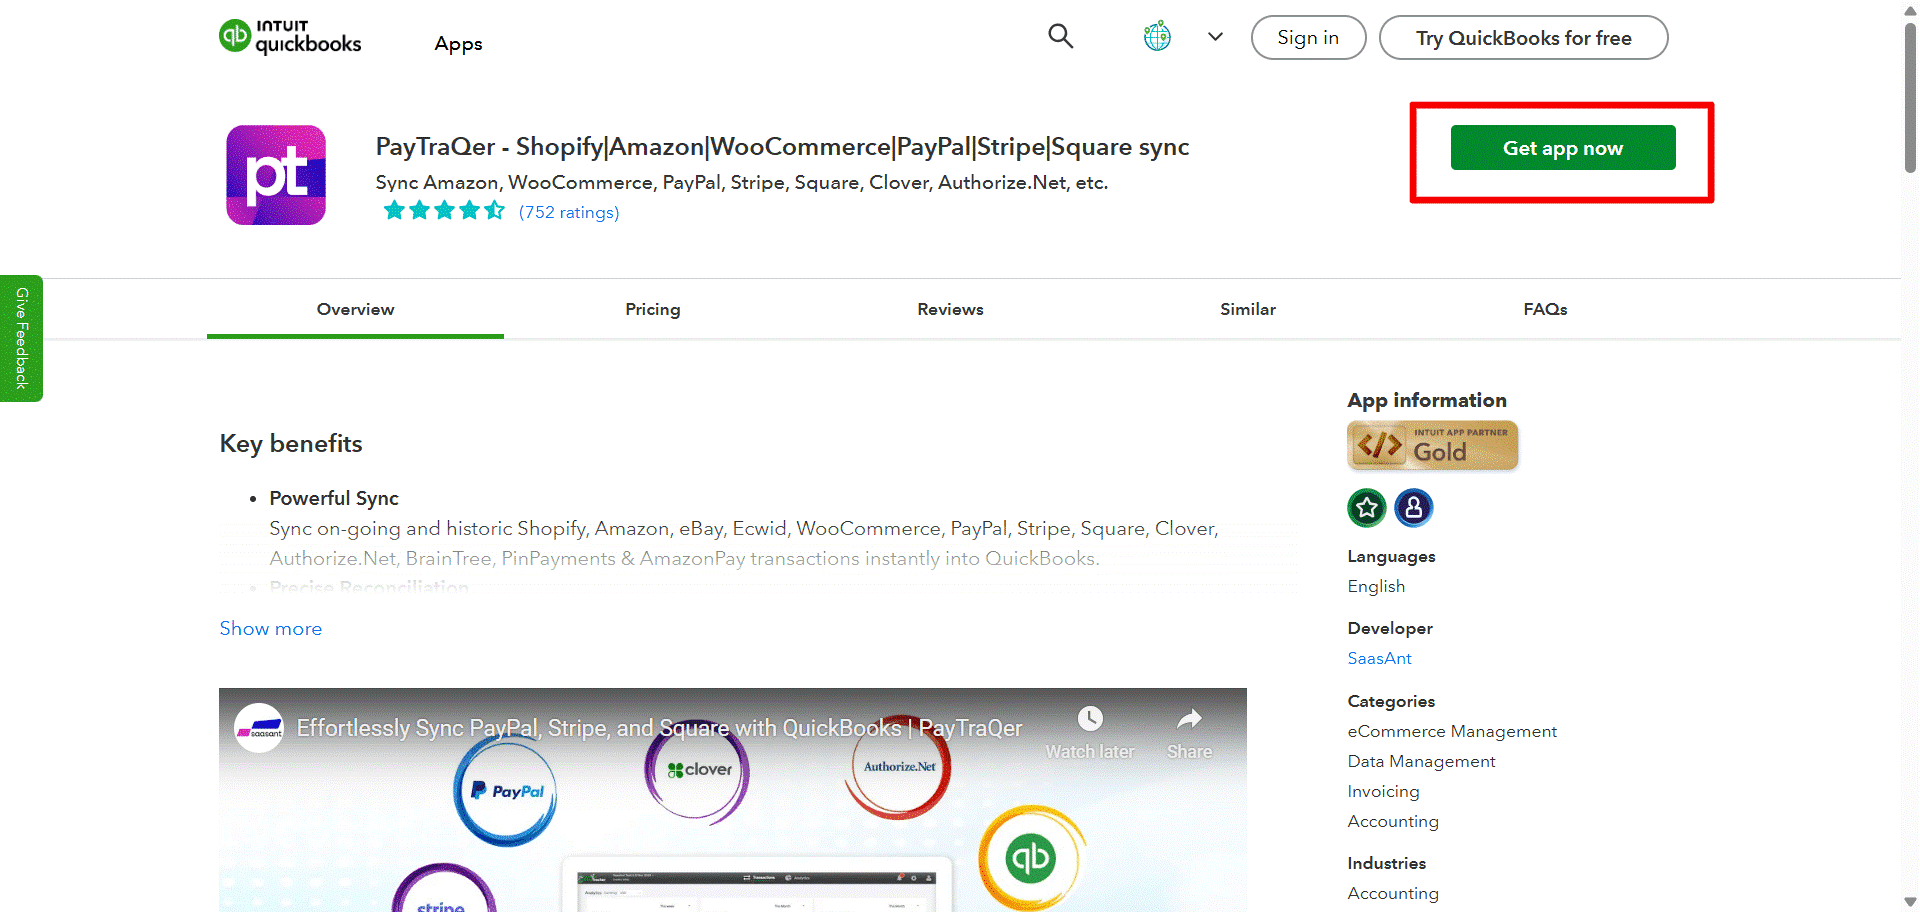
Follow the instructions to authorize and permit PayTraQer to link with your QuickBooks company file.
Step 2: Launch PayTraQer and Complete Initial Setup
After installation, launch PayTraQer from the Apps menu.
Select your QuickBooks company and verify the access permissions.
PayTraQer will assist you with an initial onboarding process to establish your syncing preferences.
This helps PayTraQer to understand your recording and tracking requirements.
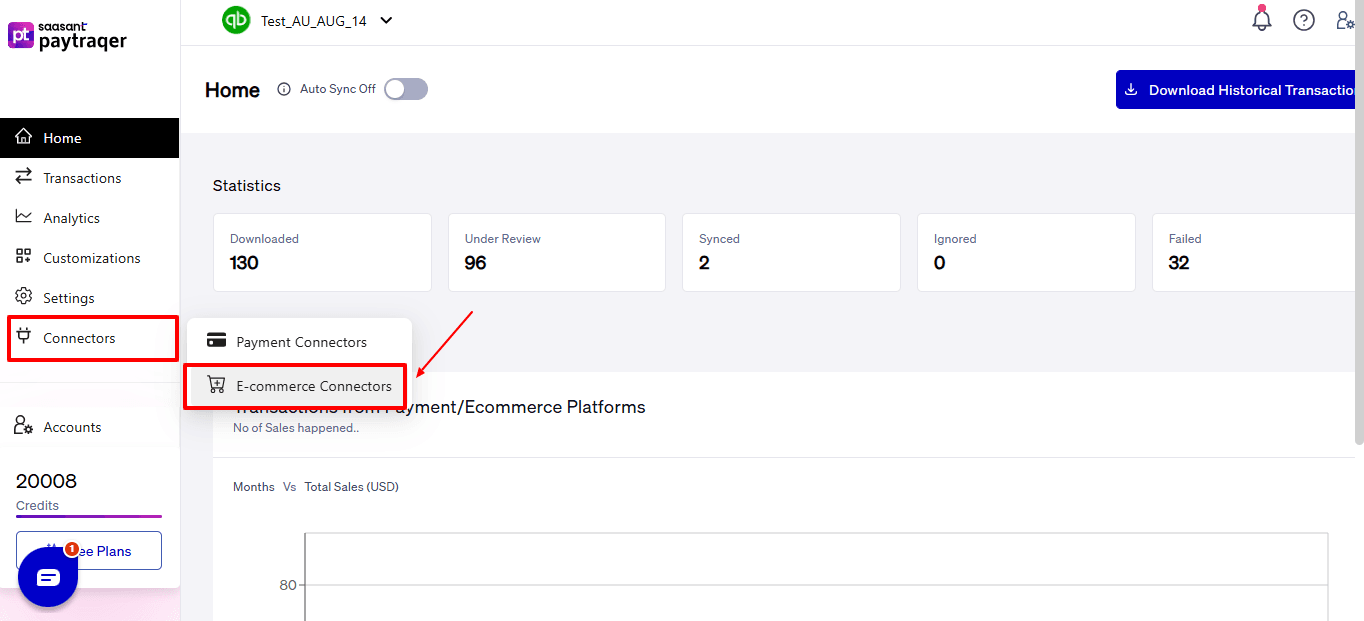
Step 3: Connect Your Shopify Seller Account to PayTraQer
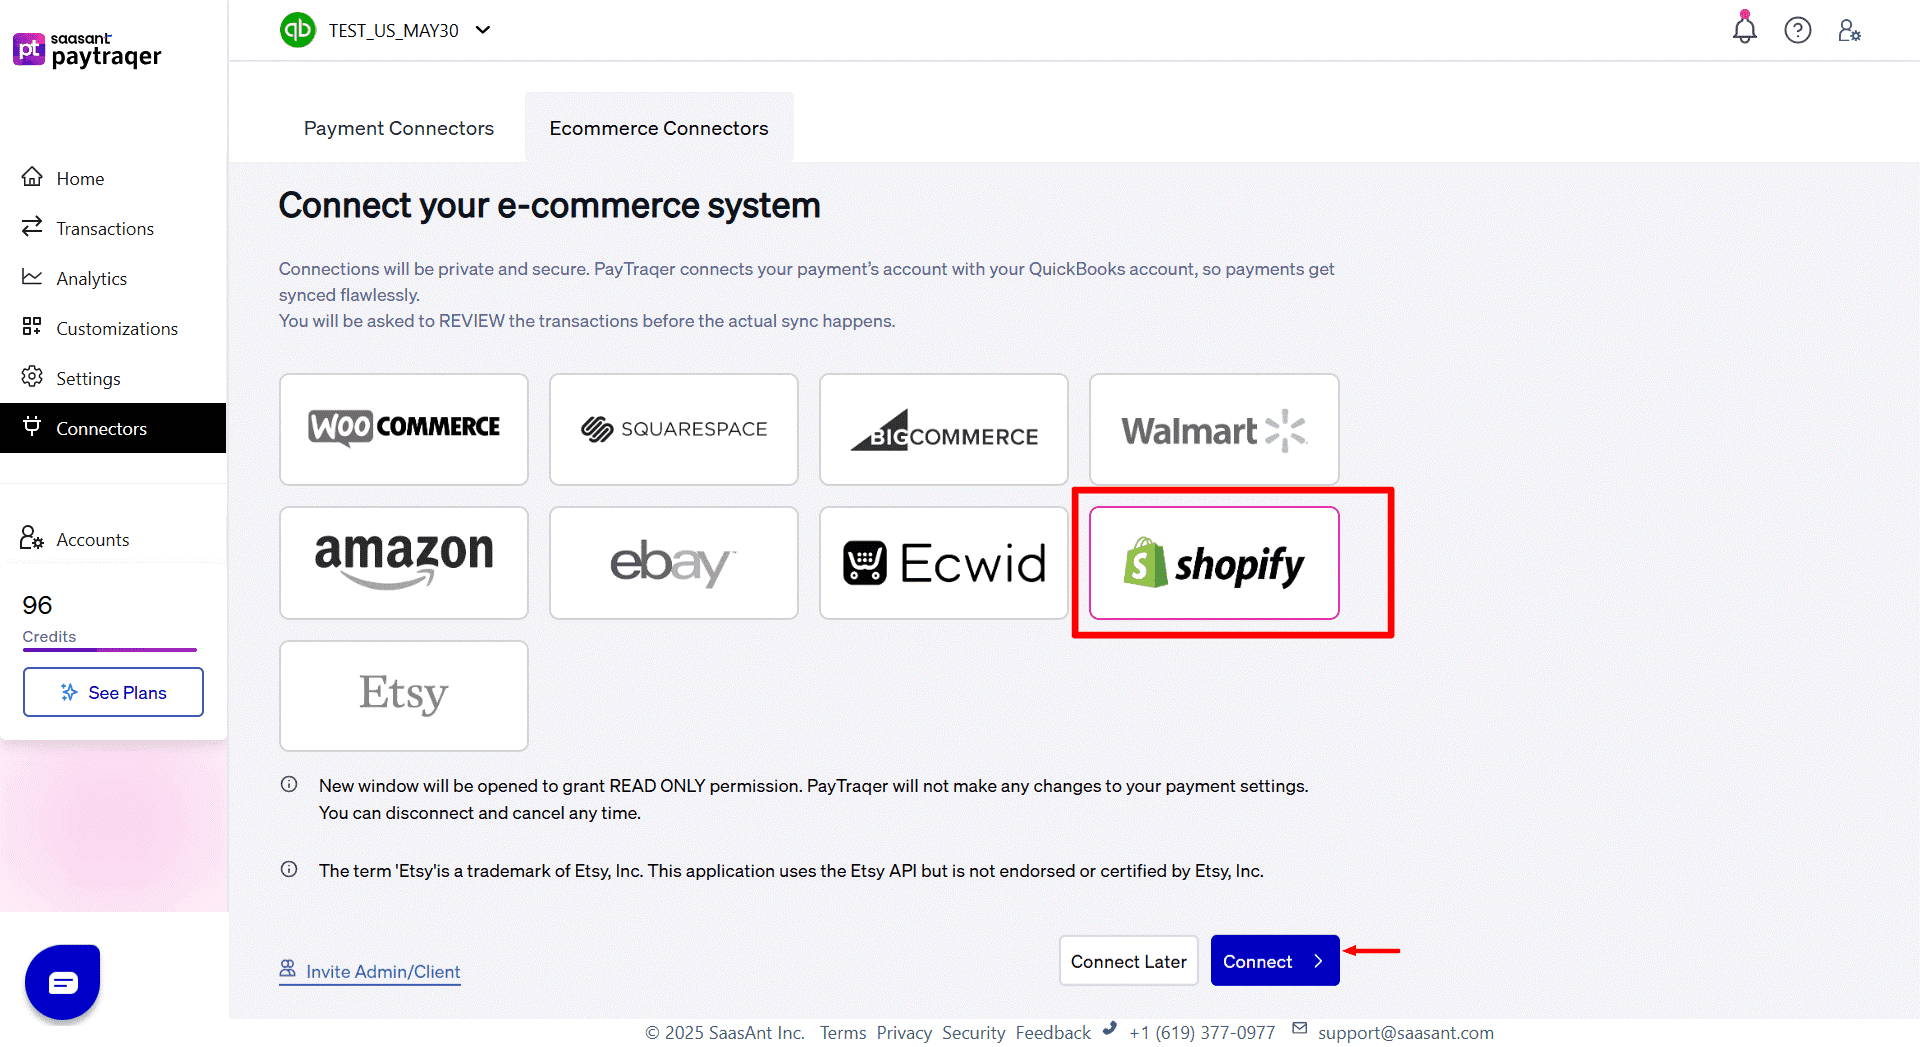
Select the “Connectors” option seen on the left side of the PayTraQer dashboard. Now, select “E-commerce Connectors” from the dropdown.
Choose Shopify from the list of supported payment and sales channels.
Choose one of the following methods based on your administrative access to Shopify:
If You Are the Shopify Admin:
Select the Connect button visible on the Shopify connector card.
Select “Proceed.” You will be redirected to the Shopify login interface.
Enter your Shopify admin email and password to sign in.
Pick the Shopify account that aligns with your business (if you have multiple accounts).
Click Connect to enable the link between Shopify and PayTraQer.
You will automatically return to PayTraQer to continue the setup process.
If You Are Not the Shopify Admin:
Select Invite Admin or Client and choose Shopify from the available account authorization options.

Click on Get Invite Link to create a secure connection link.
Distribute the link to the account owner; they need to finalize the authorization.
The link remains valid for 48 hours, so make sure to confirm promptly.
Once the admin authorizes, access will sync back to PayTraQer.
Step 4: Choose Your Data Sync Mode
PayTraQer features two sync formats that specify how Shopify transactions will be documented in QuickBooks:
Option A: Consolidated Sync (Sales Summary)
Ideal for companies with significant daily or weekly transaction volumes.
Transactions are consolidated into summary entries instead of being listed as individual invoices or receipts.
Helps keep ledgers cleaner and reduces transaction load in QuickBooks.
Enhances the speed of reconciliation as payouts and deposits align in a more predictable manner.
Option B: Itemized Sync (Individual Transaction Posting)
It is recommended if you need thorough line-level data for your reporting or recordkeeping needs.
Each transaction from Shopify is entered individually into QuickBooks.
Customer information, product details, tax information, and payment data are entirely traceable.
To continue:
Choose the sync mode that best represents how you wish the data to be displayed in QuickBooks.
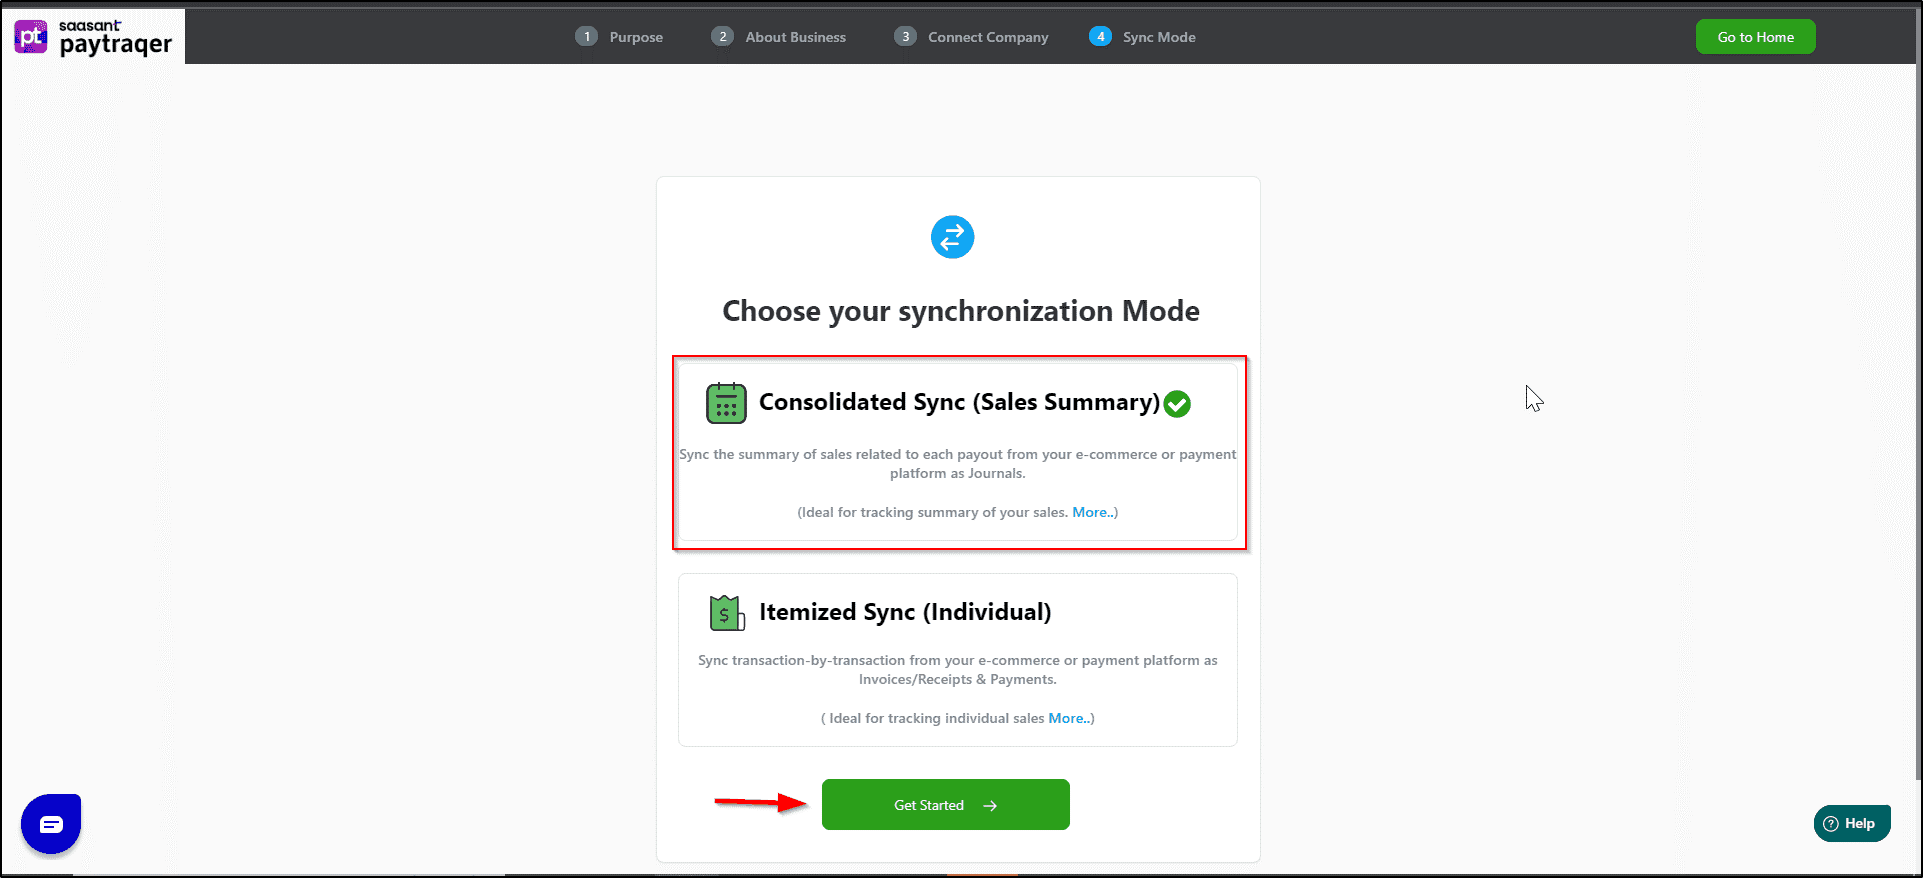
Press Get Started to validate your selection and proceed.
To modify your sync mode, click on the mode you wish to select, as indicated in the image below.

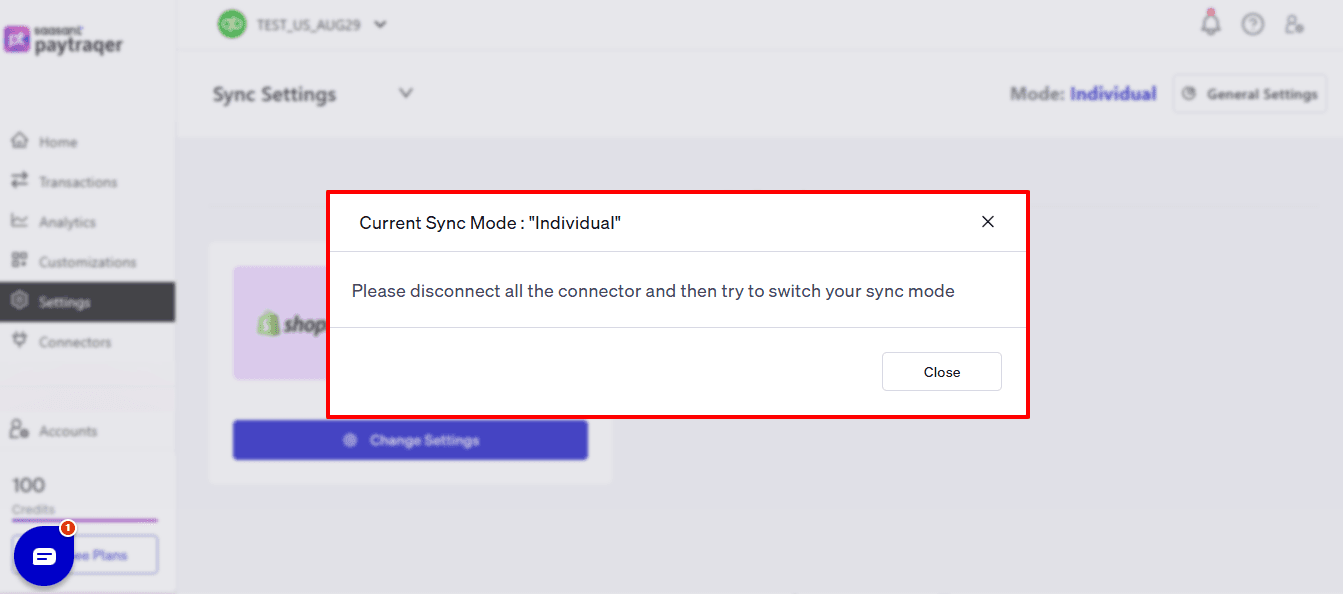
A pop-up will appear, asking you to disconnect the prior connectors before you can change the sync mode. You may proceed based on your preference.
Step 5: Configure Posting and Settlement Preferences
After connecting to Shopify, PayTraQer will request your accounting setup preferences:
Select whether PayTraQer is to automatically process Shopify payouts and settlements.
Choose the bank account in QuickBooks that will record Shopify deposits.
Assign the income account for sales revenue (like Sales Income or Online Sales).
Assign the expense account for Shopify processing fees (for example, Merchant Fees).
Choose how PayTraQer Shopifyuld match or create customer records:
Match by email
Match by name
Always create a new customer
Review the tax rate settings and decide how taxes should be mapped in QuickBooks.
After verifying all mappings and routing details, click Save Settings.
Step 6: Review Transactions Before Syncing to QuickBooks
The Transactions dashboard has various organizational views that assist in managing and checking your data flow:
Section | Purpose |
Review | Lists transactions that are ready for syncing. |
Synced | Includes transactions that have already been sent to QuickBooks. |
Error | List transactions that failed and require correction. |
Ignore | Keeps track of transactions you deliberately avoided. |
Sync History | Provides a full timeline log of previous syncs. |
To review a transaction:
Select any transaction row in the Review tab.
Verify:
Customer name or match settings
Product or service item mapping
Revenue and fee accounts
Payment date accuracy
Tax treatment
Make modifications if needed.
Click Sync to forward the transaction to QuickBooks.
Step 7: Enable Auto-Sync (Optional but Recommended)
Auto Sync is off by default to allow manual review of the first transactions.
Once you have validated that the mapping is correct and the entries are posting accurately:
Turn Auto Sync ON.
The automatic sync function ensures that Shopify transactions are always up to date, operating in the background according to your chosen schedule without needing any manual input.
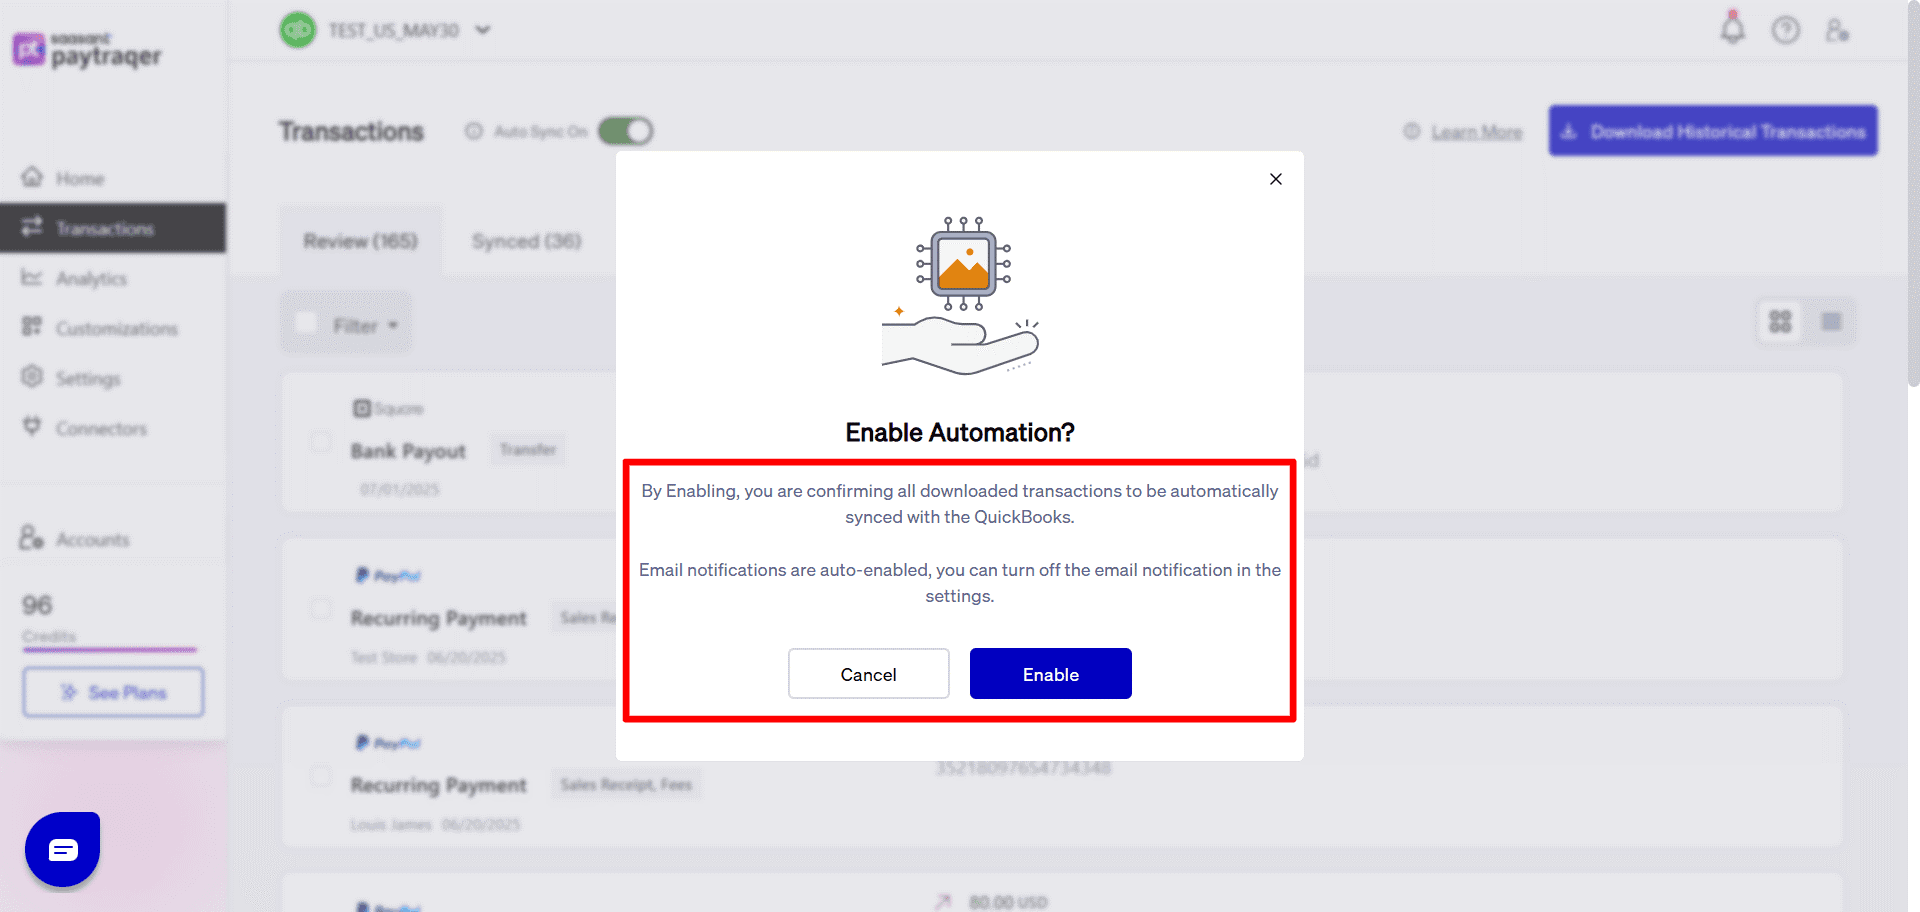
PayTraQer will then:
Automatically identify new Shopify transactions.
Implement your mapping rules.
Sync them into QuickBooks regularly.
Step 8: Download Recent Shopify Transactions
Select Download Transactions from the PayTraQer dashboard.
PayTraQer fetches transaction history from Shopify for the past 60 days.
Only finalized Shopify transactions are downloaded to avoid syncing any pending or incomplete charges.
Once the download is complete, the transactions will be listed in the Transactions section for your review.
Step 9: Download historical Shopify Transactions
Once your settings have been configured:
Proceed to the Transactions screen in PayTraQer.
Click on Download Historical Transactions.
Choose the date range for your previous Shopify orders.
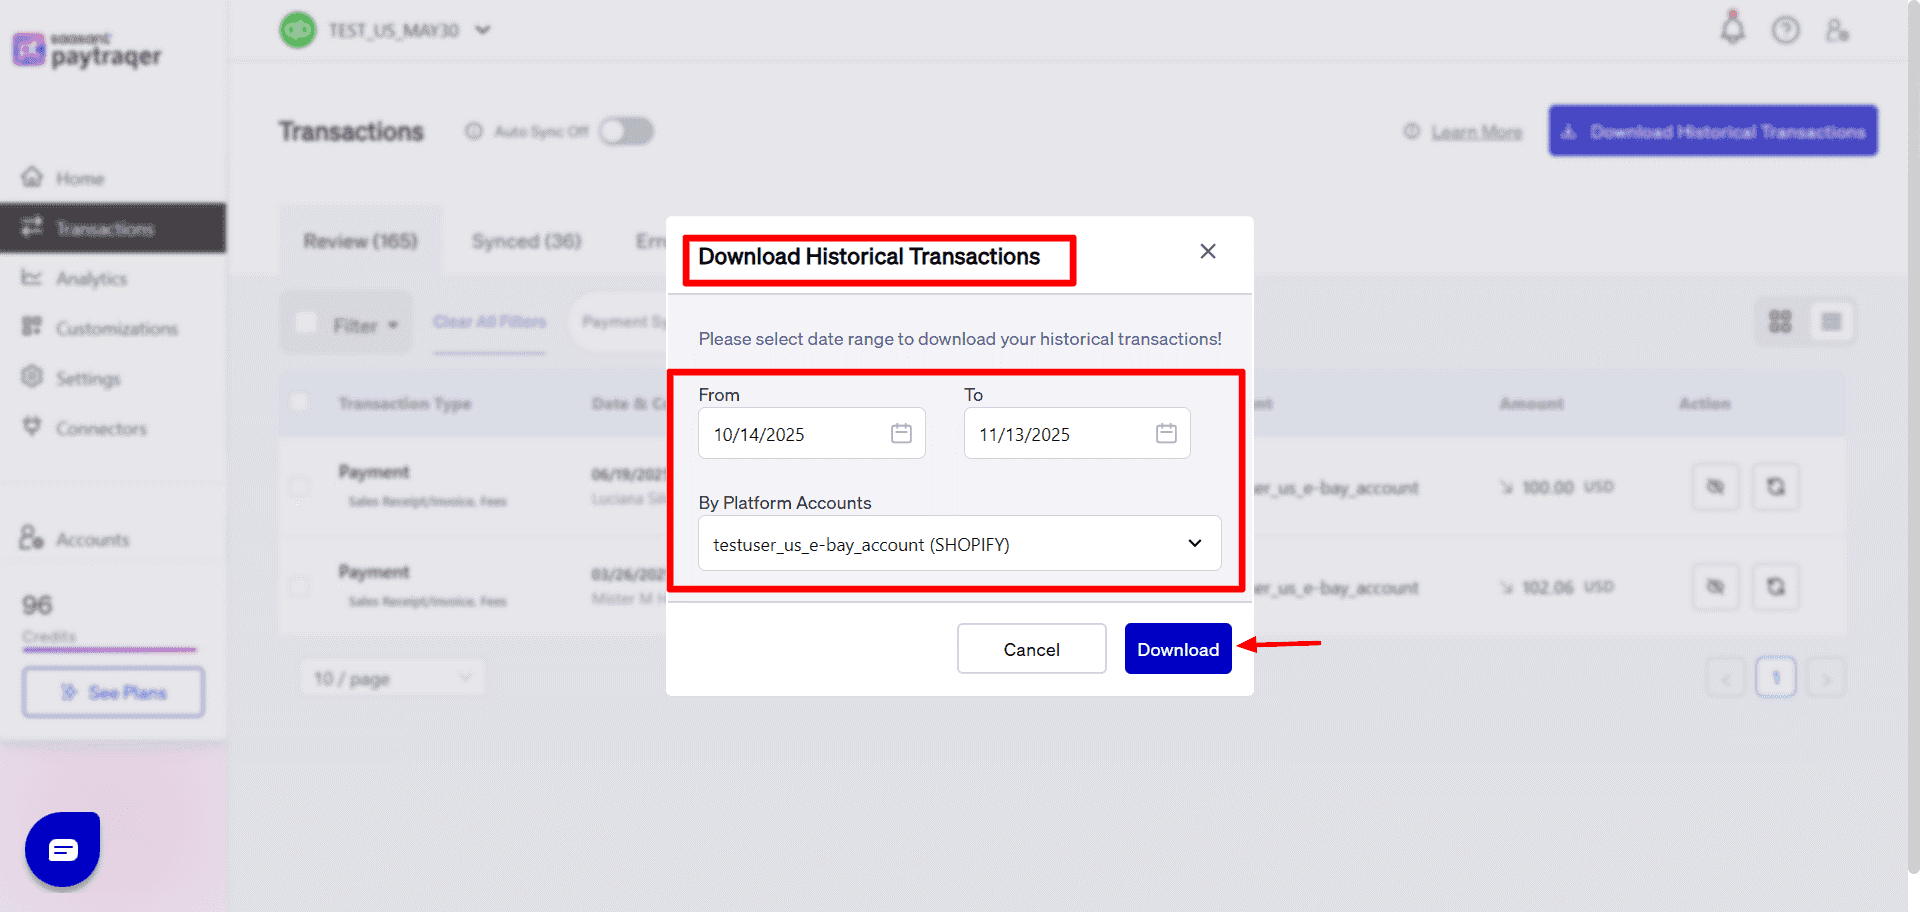
Download the information. PayTraQer will showcase these records in the Review tab.
Inspect a few sample transactions, then select and click Sync to send them to QuickBooks.
Start with smaller ranges for testing, then use larger ranges when you feel ready.
Why Connect QuickBooks with Shopify Using PayTraQer?
Integrating Shopify and QuickBooks Online takes away the hassle of manually logging e-commerce transactions. With PayTraQer, this process is easy and extremely accurate.
Real-time transaction syncing:
Accurate Payout Reconciliation for Shopify Payments: Unlike standard connectors, PayTraQer separates Shopify Payments deposits into sales, fees, and adjustments.
This ensures that reconciling Shopify payouts in QuickBooks is highly precise and avoids the errors that often occur with manual journal entries.
Dual Sync Modes for Flexible Accounting: You can choose between itemized transaction posting for detailed visibility or consolidated daily summaries for a cleaner QuickBooks. PayTraQer provides both sync modes. This adaptability is particularly beneficial for accountants managing diverse client workflows.
Error Detection: If a Shopify transaction doesn't sync, PayTraQer highlights the issue with a clear explanation. You can quickly fix the mapping and re-sync without any extra work or data loss.
Smart Product, Customer, and Tax Mapping: PayTraQer detects each Shopify item, tax code, and customer, associating them with the right QuickBooks equivalents. If there are any gaps, it creates new records on its own, ensuring neat and consistent accounting.
Error-Free Syncing: PayTraQer identifies mismatches, inactive accounts, and missing mappings, helping you resolve them right away. This guarantees that your Shopify data syncs seamlessly without interruptions or errors.
Wrap Up
The integration of Shopify with QuickBooks Online is streamlined when you utilize PayTraQer for automation. By accurately recording each sale and automatically syncing taxes, fees, and refunds, PayTraQer alleviates the manual effort, keeping your financial records clean, precise, and ready for audits. Whether you are a Shopify merchant aiming to optimize your time or an accountant overseeing numerous eCommerce clients, PayTraQer offers an ideal combination of automation, adaptability, and dependability.
If you have inquiries regarding our products, features, trial, or pricing, or if you require a personalised demo, contact our team today. We are ready to help you find the ideal solution for your QuickBooks workflow.
Frequently Asked Questions
1) Does PayTraQer sync all Shopify order details to QuickBooks Online?
Yes, PayTraQer updates all completed Shopify sales, refunds, fees, and taxes instantly. You also have the option to manually review transactions before syncing if you prefer to have full control.
2) What if a transaction fails to sync?
Failed transactions are displayed in the Error tab along with clear instructions. You can address mapping discrepancies and re-sync promptly without disrupting your existing QuickBooks data.
3) Does PayTraQer create duplicate customers or products?
No. You have the option to select matching criteria, such as matching by email or name. PayTraQer ensures that duplicate customer and product records are avoided during each sync
4) Does PayTraQer sync historical Shopify transactions?
Yes, PayTraQer is capable of downloading Shopify transactions from the past 60 days and more. You can choose to sync older transactions selectively to bridge accounting gaps without having to enter data manually.
5) Can I disable auto-sync if needed?
Indeed, auto-sync is entirely optional. You have the choice to disable it, manually review each transaction, and only sync after receiving approval to ensure the highest level of accuracy.